

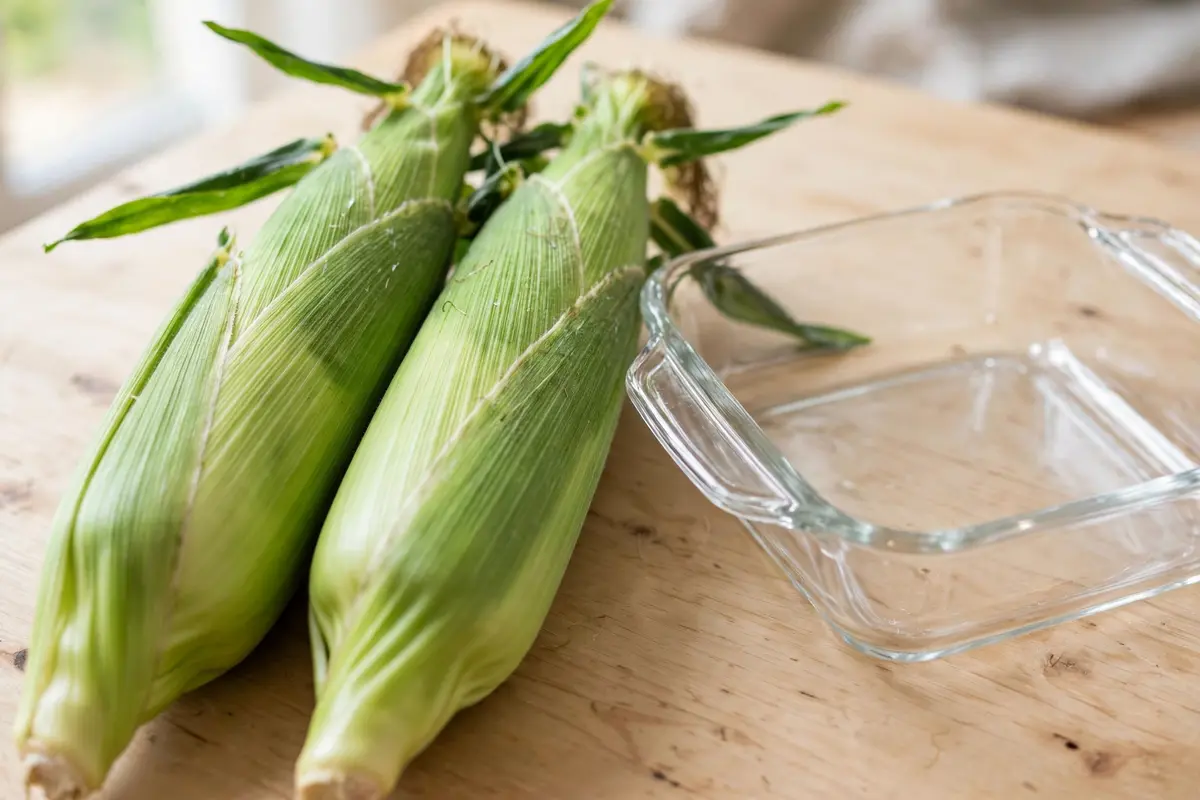
Yes, you can microwave corn on the cob, and for one to four ears it is one of the fastest ways to get sweet, tender kernels on the table. The husk works like a built-in steamer bag, so an ear cooked in its husk usually comes out juicy in 3 to 4 minutes on high. Shucked ears need a damp paper towel or a covered dish to replace that protection, and they take about the same time. The method is simple, but the details matter: dry silk can scorch, times vary a lot between microwaves, and overcooking by one minute can turn sweet kernels chewy. This guide covers the husk-on method, the shucked method, the covered-dish method, timing charts by ear count and wattage, frozen corn, reheating, safety rules, and fixes for every common problem.
Can You Microwave Corn on the Cob? The Short Answer
Yes. Place one ear of corn, husk on, directly on the microwave turntable and cook it on high for 3 to 4 minutes. Let it rest for 1 to 2 minutes, then cut off the stem end and slide the ear out of the husk. The silk usually comes off with the husk in one pull. For two ears, add about 1 to 2 minutes. For three or four ears, plan on 5 to 6 minutes total, then check and add 30-second bursts if the kernels still feel firm. If the corn is already shucked, wrap each ear in a damp paper towel and cook about 2 to 4 minutes per ear. Frozen ears need 2 to 3 extra minutes. Never wrap corn in foil in a microwave, and never cook it in a sealed container.
That short answer works for most home kitchens, but the range of times you see online is wide for a reason. Some guides say 2 minutes per ear, others say 4 minutes per ear, and both can be right in their own kitchen. Ear size, corn variety, starting temperature, and microwave wattage all change the result. A small, fresh ear in a 1200-watt oven can be done in 2 minutes, while a large ear in a 700-watt oven can need 5 minutes. The rest of this guide gives you starting times plus the checks that tell you when the corn is actually done, so you are not guessing.
Why the Microwave Works So Well for Corn
Corn is almost built for microwave cooking. Fresh kernels hold a lot of water, and microwaves heat by exciting water molecules. That means the corn steams itself from the inside out, using its own moisture, instead of sitting in a pot of boiling water that pulls sugars and flavor out of the kernels. The result is sweeter corn with less cleanup: one plate, no big pot, no waiting for water to boil.
The husk makes the method even better. It traps the steam that the kernels release, so the ear cooks in a small, moist pocket. The silk, which is a pain to remove from raw corn, loosens as the steam softens it, and it often slides off with the husk after cooking. Cooks on Reddit praise exactly this part of the method. One user wrote that the husk and silks just slide right off and called it the quickest way to fresh corn. Another said it is the only way they will cook corn now. The praise is not hype: shucking after cooking really is easier than shucking before cooking.
Microwaving also keeps more of the corn’s natural color and flavor than boiling does, because the kernels never sit in water. Boiling leaches sugars into the pot, which is why boiled corn can taste flat if it cooks too long. Grilling adds a smoky flavor that many people love, but it takes 15 minutes or more plus time to heat the grill. The microwave gives you a cooked ear in under 5 minutes with no preheating. That speed is the real reason people keep coming back to this method on busy weeknights.
There are limits, and an honest guide should name them. The microwave cannot brown or char kernels, so if you want grilled flavor, you will not get it here. It also cooks unevenly when you crowd the oven: more than four ears at once leads to cold spots in the middle of the pile. And the window between tender and overcooked is narrow. Corn goes from crisp and sweet to soft and dull in about a minute, so checking early matters more than getting the time exactly right on the first try.
How to Microwave Corn on the Cob in the Husk
The husk-on method is the easiest and the most popular, and it needs no special equipment. Start by choosing fresh ears. Look for husks that are bright green and slightly damp, not dry and papery, and silk that is moist and light brown rather than black and dry. Dry, shriveled husks are a sign the corn has been sitting for days, and the kernels inside have already started turning their sugar into starch. That corn will taste less sweet no matter how you cook it, so pick the freshest ears you can.
Trim the loose, dry silk strands that stick out of the tip of the ear, because long dry strands can scorch in the microwave. Rinse the husk under cool water and shake off the drips. A lightly wet husk makes steadier steam than a bone-dry one. Do not peel the husk back, and do not remove the silk inside. The whole point is to leave the natural wrapper in place.
Place the ear directly on the microwave turntable. If you are cooking two ears, lay them side by side in a single layer, not stacked. Stacking creates cold spots where the ears touch. If you are cooking three or four ears, arrange them in a loose circle or a single row, again without stacking. Cook on high using the timing chart below as your starting point, then let the corn rest in the microwave with the door closed for 1 to 2 minutes. That rest is not optional: it lets the heat even out and finishes cooking the cooler parts of the ear.
Handle the ear with a towel or oven mitt, because the husk and the steam inside it are very hot. Cut off about 1 inch from the stem end, the wide end where the ear was cut from the stalk. Then grab the silk end and squeeze the ear out of the husk. The ear should slide out cleanly, and most of the silk should come off with the husk. If a few silk strands stick to the kernels, wipe them off with a damp paper towel or brush them off with a clean kitchen towel while the corn is still warm.
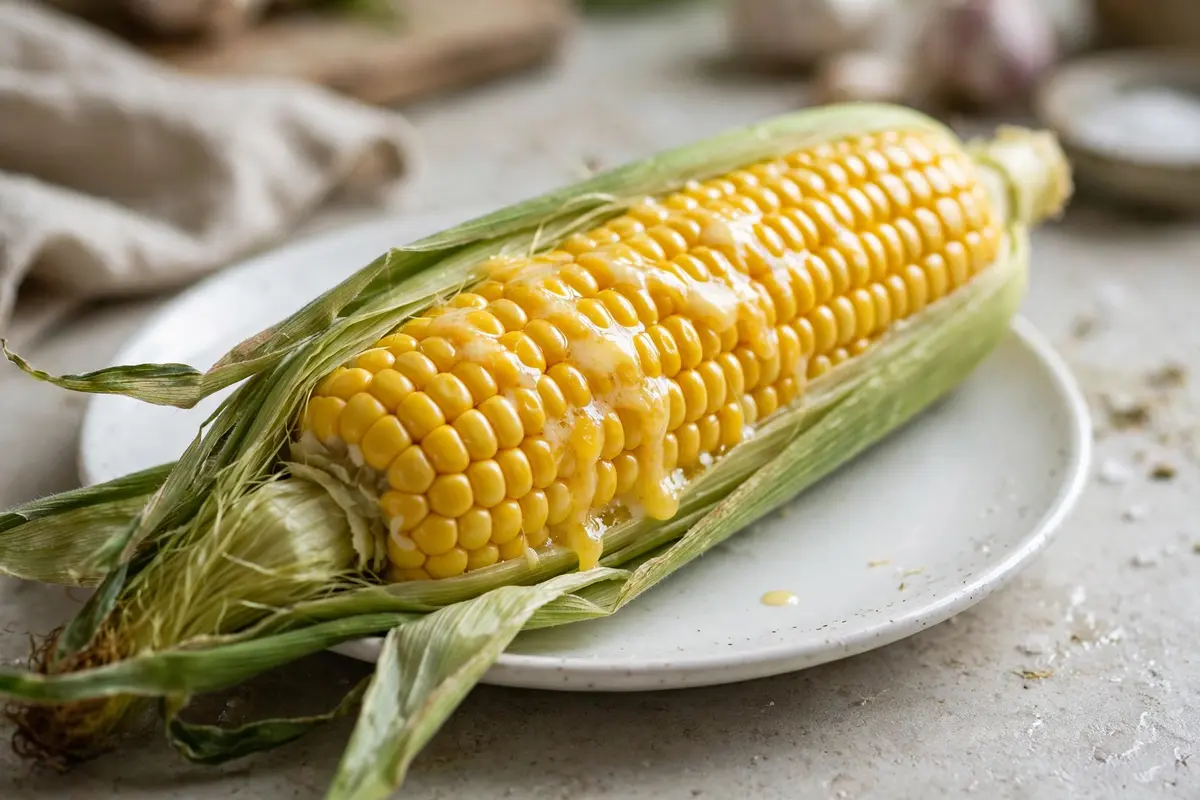
Season right away. Butter melts best on hot kernels, so add it while the corn is still steaming. Salt, pepper, lime and chili, or a little grated cheese all work well. If you like, roll the hot ear in butter on a plate instead of spreading it with a knife: the kernels pick up an even coat that way.
Step by Step: Husk-On Method
First, pick fresh ears with green, slightly damp husks and moist silk. Trim the long dry silk strands at the tip so they cannot scorch. Rinse the husk under cool water and shake off the extra water. Place one to four ears in a single layer on the turntable, not stacked. Microwave on high for 3 to 4 minutes for one ear, adding about 1 to 2 minutes for each extra ear. Let the corn rest in the microwave for 1 to 2 minutes with the door closed. Cut off the stem end, squeeze the ear out of the husk from the silk end, and season while it is hot.
How to Microwave Shucked Corn on the Cob
Many stores sell corn already shucked, and sometimes you have already removed the husk before you decide to microwave it. Shucked corn still microwaves well, but you have to replace the protection the husk gave. Without a barrier, the microwave pulls moisture straight out of the kernels, and they turn chewy and dented. A damp paper towel does the job.
Remove the husk and silk completely, then rinse the ear under cool water. Wet a paper towel, squeeze out the extra water so it is damp but not dripping, and wrap it snugly around the ear. Place the wrapped ear on a microwave-safe plate. Cook on high for about 2 to 4 minutes for one ear, depending on your microwave power and the size of the ear. Add about 1 to 2 minutes for each extra ear, and let the corn rest for 1 minute before unwrapping.
Be careful when you unwrap it. The paper towel holds hot steam, so peel it back from the side away from your face and hands. Check the kernels: they should look plump and glossy, and a kernel should pop with juice when you bite it. If the kernels look wrinkled or feel firm, wrap the ear in a fresh damp towel and cook for another 30 seconds.
Plastic wrap is sometimes suggested as a wrap for shucked corn, but it needs care. Only use plastic wrap that is labeled microwave safe, and leave a small vent so steam can escape. A tightly sealed wrap can trap steam and burst, and wrap that is not rated for microwave use can melt onto the food. A damp paper towel is simpler and safer, so it is the method this guide recommends.
Step by Step: Shucked Method
Remove the husk and silk, then rinse the ear. Wet a paper towel and squeeze out the extra water. Wrap the towel snugly around the ear and place it on a microwave-safe plate. Microwave on high for 2 to 4 minutes for one ear, adding 1 to 2 minutes for each extra ear. Rest for 1 minute, then unwrap carefully away from your face. Check the kernels and add 30-second bursts if they still feel firm.
How to Microwave Corn on the Cob in a Covered Dish
The covered-dish method works well when you are cooking several ears at once, or when you want to add butter and seasoning before cooking. Lay the shucked ears in a microwave-safe dish, add 2 to 3 tablespoons of water, and cover loosely with a microwave-safe lid or plate. The cover traps steam the same way the husk does, and the small amount of water keeps the kernels moist.
Cook on high for 4 to 6 minutes for two to four ears, then rest for 1 to 2 minutes before removing the cover. Lift the cover away from your face, because a dish full of hot steam can burn. Turn the ears halfway through cooking if your microwave has no turntable, so the ears on the edges and in the middle cook evenly. Drain off any water left in the dish, then season the corn while it is hot.
This method also works for loose kernels. Cut the kernels off the cob into a microwave-safe bowl, add 1 tablespoon of butter and 1 tablespoon of water, cover with a microwave-safe plate or vented lid, and cook on high for 2 to 3 minutes. Stir halfway through. Loose kernels cook faster than whole ears because the heat reaches every kernel at once, so check them early.
Corn on the Cob Microwave Times: The Full Chart
The chart below gives starting times for a 1000-watt microwave. If your microwave is 700 to 800 watts, add about 1 minute. If it is 1200 watts, start at the low end of the range. Always check doneness and add 30-second bursts rather than cooking the full time in one go. Corn continues to cook from residual heat for 1 to 2 minutes after the microwave stops, so pulling it out slightly early is safer than leaving it in too long.
| Amount | Husk On (1000W) | Shucked, Damp Towel (1000W) | Covered Dish (1000W) |
|---|---|---|---|
| 1 ear | 3 to 4 minutes | 2 to 4 minutes | 3 to 4 minutes |
| 2 ears | 4 to 6 minutes | 4 to 5 minutes | 4 to 6 minutes |
| 3 ears | 5 to 6 minutes | 5 to 7 minutes | 5 to 6 minutes |
| 4 ears | 5 to 7 minutes | 6 to 8 minutes | 6 to 8 minutes |
| Frozen, 2 ears | 6 to 8 minutes | 6 to 8 minutes | 6 to 8 minutes |
| Loose kernels, 2 cups | Not applicable | Not applicable | 2 to 3 minutes |
| Leftover cooked ear | Not applicable | 45 to 60 seconds | 1 to 2 minutes |
Notice how wide the ranges are. That spread is honest: different guides disagree, and your own microwave is the deciding factor. One well-known food site says 2 minutes per ear, another says 4 minutes per ear, and a third says to add roughly 2 minutes for each extra ear. All three can be right in the kitchen where they were tested. The practical rule is to start short, check, and add time in small bursts. You can always add 30 seconds. You cannot undo a minute of overcooking.
Wattage matters more than most people expect. A 700-watt microwave can need a full extra minute per ear compared with a 1200-watt model. If you do not know your wattage, check the label inside the door or on the back of the oven. If you cannot find it, start with the longer end of the range and check early. Once you know the time that works in your oven, write it down: it will be the same every time for the same size of ear.
Can You Microwave Frozen Corn on the Cob?
Yes, frozen corn on the cob microwaves well, but it needs more time and a little extra care. Frozen ears carry ice crystals on the surface, and that ice has to melt before the kernels can start cooking. Plan on 5 to 8 minutes for two frozen ears on high, which is roughly 2 to 3 minutes longer than fresh ears. Start at the low end, check, and add 30-second bursts until the kernels are hot all the way through.
The husk-on method works for frozen ears if they still have their husks, but most frozen ears are sold shucked. For shucked frozen ears, wrap each one in a damp paper towel or lay them in a covered dish with 2 tablespoons of water. The extra moisture matters because frozen kernels dry out fast once the ice is gone. Stir or turn the ears halfway through cooking so the side facing the microwave wall does not overcook while the center stays cold.
One thing to avoid: do not thaw frozen corn at room temperature for hours before microwaving it. Food safety guidance says cooked and perishable food should not sit at room temperature for more than 2 hours, or more than 1 hour when it is hot outside. If you want to thaw first, move the corn to the refrigerator overnight. But thawing is not required. Cooking straight from frozen is safe as long as the corn gets hot all the way through, and it is the simpler option.
Frozen loose kernels are even easier. Put them in a microwave-safe bowl, add 1 tablespoon of water, cover loosely, and cook on high for 2 to 4 minutes, stirring halfway. The package directions on the bag are a good starting point, but check the kernels yourself: they should be steaming hot and tender, not lukewarm in the middle.
Can You Microwave Loose Corn Kernels?
Yes. Loose kernels, whether cut fresh off the cob or poured from a frozen bag, are one of the easiest things to microwave. Put the kernels in a microwave-safe bowl, add 1 tablespoon of butter and 1 tablespoon of water for each 2 cups of kernels, and cover with a microwave-safe plate or a vented lid. Cook on high for 2 to 3 minutes, stir, and check. Fresh kernels usually need the full 2 to 3 minutes. Frozen kernels need 3 to 4 minutes because they start cold.
Spread the kernels in a thin layer if you can. A deep pile cooks unevenly: the kernels on top get hot while the ones at the bottom stay cool. A wide, shallow dish beats a tall, narrow bowl for this reason. Stirring halfway through fixes most uneven heating, so do not skip that step.
Canned corn is already cooked, so it only needs heating. Drain it, put it in a microwave-safe bowl, cover loosely, and heat on high for 1 to 2 minutes until it is steaming. Add no extra water, since canned corn is already wet. Stir before serving so the heat spreads evenly.
How to Reheat Corn on the Cob in the Microwave
Reheating is where the microwave really earns its keep, because leftover corn dries out fast in the oven and takes too long on the stove. Wrap a leftover cooked ear in a damp paper towel and microwave on high for 45 to 60 seconds. That is usually enough. If the ear is large or your microwave is low powered, add 15 to 30 seconds at a time.
For several leftover ears, use a covered dish with a tablespoon of water and cook for 1 to 2 minutes. The cover and the water replace the moisture the corn lost in the refrigerator. Loose leftover kernels reheat in 1 to 2 minutes in a covered bowl with a splash of water.
Do not reheat corn more than once. Each round of cooling and reheating dries the kernels further and gives bacteria more chances to grow. Food safety guidance from the USDA notes that microwaves can leave cold spots where germs survive, so when you reheat a mixed dish that contains corn with meat, poultry, or eggs, heat it until the center reaches 165 degrees Fahrenheit (74 degrees Celsius) and let it stand for a minute before eating.
How to Tell When Microwaved Corn Is Done
Time alone does not tell you the corn is done. Your microwave, the size of the ear, and the starting temperature all shift the answer. Use these checks instead, and you will get good corn every time.
Look at the kernels. Done corn looks plump and glossy, with a bright yellow or white color depending on the variety. Undercooked kernels look pale and feel hard when you press one with a fork. Overcooked kernels look wrinkled and dull, and they feel soft and mushy instead of crisp.
Bite one kernel. It should pop with juice and taste sweet, with a slight snap. If it feels chalky or starchy, it needs more time. If it feels mushy and the sweetness has gone flat, it is overcooked, and no fix will bring it back.
Feel the ear. The whole cob should feel hot all the way through, not just at the tips. The ends cook faster than the middle, so check the center kernels. If the middle still feels cool or firm, give the ear another 30 seconds and rest it for a minute before checking again.
Use the fork test. A fork should slide into a kernel easily, and the kernel should split open with juice. If the fork meets resistance, the corn needs more time. If the kernels fall apart under the fork, the corn has gone too far.
Is It Safe to Microwave Corn on the Cob?
Yes, microwaving corn is safe when you follow basic microwave food safety rules. The rules come from the USDA Food Safety and Inspection Service, which publishes guidance on cooking with microwave ovens, and from Clemson University Extension, which covers microwave food safety in plain language. The core ideas are simple: use microwave-safe containers, cover food so steam builds up, rotate or stir so heat spreads evenly, and let food stand after cooking so hot and cool spots even out.
Cold spots are the main safety concern with any microwave cooking. Microwaves heat unevenly, and they can leave cool patches where bacteria survive. Corn on the cob is a low-risk food on its own, since plain corn has no meat, poultry, or eggs in it, but the same habits still matter: arrange ears in a single layer, turn them if your microwave has no turntable, and let them rest for 1 to 2 minutes after cooking. That standing time is when the heat finishes spreading through the ear, and it is the step most people skip.
Steam burns are the most common real injury from microwaving corn. The husk, the paper towel, and the dish all hold very hot steam, and opening them toward your face can burn you. Always open covers and unwrap ears away from your face, and use a towel or oven mitt to handle the hot ear. Keep your face away when you cut the stem end, because steam escapes from the cut as well.
Storage matters too. Cooked corn should go into the refrigerator within 2 hours, or within 1 hour if the room is hot, and it keeps for 3 to 4 days in a sealed container. Reheat it once, and heat it until it is steaming hot all the way through. If cooked corn smells sour, feels slimy, or shows mold, throw it out. Cooking does not make spoiled corn safe again.
The container rules are worth stating plainly. Use glass, ceramic, or plastic that is labeled microwave safe. Never use metal, foil, or containers with metal trim in the microwave, because metal can spark and damage the oven. Never cook corn in a sealed container: trapped steam can build pressure and burst. A loose cover or a vented lid is what you want, never an airtight seal.
For more detail on these rules, the USDA guide on cooking safely in the microwave and the Clemson Extension factsheet on microwave food safety are both useful reading. They cover the same points in more depth, including how to check food temperatures and how to arrange food for even heating.
Common Mistakes and How to Fix Them
Most microwaved corn failures come from a small number of mistakes, and each one has a simple fix. The table below covers the ones people run into most often, based on the complaints that show up again and again in cooking forums and recipe comments.
| Problem | Likely Cause | Fix |
|---|---|---|
| Chewy, dry kernels | Cooked without husk or wrap, so moisture escaped | Wrap shucked ears in a damp paper towel or use a covered dish with water |
| Mushy, dull corn | Overcooked by a minute or more | Start short, check early, add 30-second bursts only |
| Scorched dry silk | Long dry silk strands sticking out of the husk tip | Trim dry silk at the tip before cooking |
| Silk stuck to kernels | Ear pulled out of the husk too fast or too cold | Cut the stem end and squeeze the ear out while it is still hot |
| Rubbery texture | Reheated too long or reheated more than once | Reheat once, 45 to 60 seconds, wrapped in a damp towel |
| Cold middle, hot ends | Ears stacked or no rest time after cooking | Cook in a single layer, rest 1 to 2 minutes before serving |
| Wrinkled kernels | Too little moisture, cooked uncovered | Add water to the dish or dampen the towel more |
| Bland flavor | Old corn or corn boiled in water first | Buy fresh ears with green husks, microwave instead of boiling |
| Uneven cooking, 4 ears | Too many ears crowded in the oven | Cook at most 4 ears at once, in a single layer, turning halfway |
The dry-kernel problem deserves a closer look, because it is the complaint people post about most. If your corn comes out chewy, the cause is almost always lost moisture, not the wrong time. The husk or the damp towel is what keeps the steam around the kernels, and cooking a bare ear with no cover at all is the fastest way to dry corn out. The fix is not more time. It is more moisture: a wetter towel, a covered dish, or a splash of water in the bowl.
The overcooking problem is the opposite trap. Corn has a narrow window, and the difference between tender and mushy is about a minute. If you always overshoot, set the timer shorter than you think you need and check the corn. After two or three tries, you will know the exact time for your microwave and the size of ear you usually buy. That number is more useful than any chart, because it is measured in your kitchen.
Microwave vs Boiling vs Grilling: Which Is Best for Corn?
Each method has a real strength, and the best choice depends on what you want. The microwave wins on speed and simplicity. One ear takes 3 to 4 minutes, there is no pot to wash, and the corn stays sweet because it never sits in water. It is the best method for one to four ears on a busy night.
Boiling wins when you are cooking for a crowd. A big pot can hold eight or ten ears at once, and the water keeps the temperature even. The downside is flavor: boiling pulls sugars out of the kernels, and corn left in the pot too long turns waterlogged and dull. If you boil, keep the time short, about 3 to 5 minutes once the water is boiling, and take the corn out as soon as it is done.
Grilling wins on flavor. The high heat chars the kernels and adds a smoky taste that no other method can match. The downside is time and attention: the grill needs 10 to 15 minutes to heat, and the corn needs turning every few minutes. Grilling is the best choice for a barbecue, and the microwave is the best choice for a Tuesday.
Roasting in the oven sits between the two. It takes 25 to 30 minutes, and it gives the corn a slightly nutty flavor, but it heats up the whole kitchen. For most people, the microwave is the everyday method, grilling is the weekend method, and boiling is the big-batch method. There is no single right answer, only the right method for the meal in front of you.
What Not to Do When Microwaving Corn
Some mistakes are just disappointing, like dry kernels. Others are unsafe, and those are worth listing clearly. Never wrap corn in aluminum foil in the microwave. Foil reflects microwave energy, and it can spark, damage the oven, and start a fire. If you want a wrap, use a damp paper towel.
Never cook corn in a sealed container or a tightly closed bag. Steam builds pressure inside a sealed container, and it can burst open when you touch it. Always leave a vent, use a loose lid, or use a plate set on top of the dish instead of a tight seal.
Never use a container that is not labeled microwave safe. Some plastics melt or warp in the microwave, and some glazes on ceramic dishes contain metal that can spark. Glass and ceramic dishes marked microwave safe are the safest choices. If a container has gold or silver trim, keep it out of the microwave.
Never microwave corn that smells sour, feels slimy, or shows mold. Spoiled corn does not become safe when you cook it, and the microwave will not fix it. Throw it out.
Never leave cooked corn at room temperature for hours. The 2-hour rule applies: refrigerate cooked corn within 2 hours, or within 1 hour when it is hot outside. And never reheat the same ear twice. Reheat once, eat it, and move on.
Finally, never skip the rest time. It feels like a waste of a minute, but it is when the heat finishes spreading through the ear. Corn taken straight out of the microwave and unwrapped at once is more likely to have cool spots in the middle and to lose its steam before the kernels finish cooking.
Choosing and Storing Corn for the Microwave
Good microwaved corn starts at the store, not in the kitchen. Pick ears with bright green husks that feel slightly damp and fit tightly around the ear. The silk should be moist and light brown. If the silk is black and dry, or the husk is papery and pulling away, the corn is old. The kernels should feel plump through the husk when you squeeze the ear gently. Avoid ears with soft spots, dark patches, or a sour smell.
Size matters for timing. Small ears cook faster than large ones, and a batch of mixed sizes will cook unevenly. Try to buy ears that are close to the same size, so they finish at the same time. If you have one large ear and one small ear, cook the large one for a minute first, then add the small one.
Store fresh corn in the refrigerator, husks on, and use it within 1 to 2 days for the best sweetness. Corn loses sugar fast after picking, and every day in the fridge makes it a little less sweet. If you buy more than you can use in two days, cut the kernels off the extra ears and freeze them in a bag. Frozen kernels keep for months and microwave in minutes.
Cooked corn keeps for 3 to 4 days in the refrigerator in a sealed container. Let it cool for a few minutes before sealing it, so condensation does not make the kernels soggy. Label the container with the date if you cook in batches, so you know which corn to eat first.
Serving Ideas for Microwaved Corn on the Cob
Plain butter and salt is the classic, but microwaved corn takes seasoning well because the hot kernels melt butter and soak up flavor fast. Try lime juice with chili powder and a little salt for a street-corn feel, or garlic butter with chopped parsley for a simple side dish. Grated Parmesan sticks nicely to hot, buttered kernels. For a smoky note without a grill, add a pinch of smoked paprika to the butter before you spread it.
Corn on the cob goes with almost any summer meal: grilled chicken, burgers, barbecue ribs, fish tacos, or a simple salad. Cut the kernels off a microwaved ear and toss them into a salad, a salsa, or a bowl of rice, and you have a side dish in minutes. Leftover kernels also work in soups, quesadillas, and fried rice, where their sweetness balances spicy or salty flavors.
If you want a fuller microwave vegetable spread, corn pairs well with other quick microwave sides. Sweet potatoes, for example, microwave in 5 to 8 minutes, and you can cook them while the corn rests. A baked potato takes longer, about 7 to 10 minutes depending on size, so start it first and add the corn near the end. For a full guide to the main microwave vegetable hub, see our overview of what you can and cannot microwave, and for more single-vegetable guides, try microwaving sweet potatoes, microwaving a potato, or microwaving frozen vegetables.
Corn on the Cob Nutrition in the Microwave
Corn is a starchy vegetable with fiber, vitamin C, B vitamins, and magnesium. One medium ear has roughly 90 to 100 calories before butter, and about 2 to 3 grams of fiber. Microwaving is a good way to keep those nutrients, because it cooks fast and uses very little water. Boiling, by contrast, lets water-soluble vitamins leak into the pot. The same principle applies to other vegetables: short cooking times and little water preserve more nutrients than long boiling.
Butter is where the calories add up. One tablespoon of butter adds about 100 calories, so if you are watching calories, use a light brush of butter or try lime juice, herbs, or a little olive oil instead. Salt is a matter of taste, but a small pinch goes a long way on hot corn. The corn itself is naturally sweet, so it needs less seasoning than most people add.
Corn is naturally gluten free, and it is a whole grain, which means it keeps you full longer than refined starches. It is not a low-carb food, but as part of a balanced meal with protein and other vegetables, it fits easily into most diets. If you have diabetes or you watch blood sugar, portion size matters more than the cooking method: one ear is a reasonable serving for most people.
Frequently Asked Questions
These are the questions people ask most about microwaving corn on the cob, answered directly. Each answer starts with the short version, then adds the detail you need.
Can you microwave corn on the cob?
Yes. Microwave one ear in its husk on high for 3 to 4 minutes, rest it for 1 to 2 minutes, then cut off the stem end and slide the ear out. Shucked ears work too: wrap each one in a damp paper towel and cook 2 to 4 minutes per ear. Never wrap corn in foil, and never cook it in a sealed container.
How long does it take to microwave corn on the cob?
One ear takes 3 to 4 minutes on high in a 1000-watt microwave. Two ears take 4 to 6 minutes. Three or four ears take 5 to 7 minutes. Add about 1 minute if your microwave is 700 to 800 watts, and start at the low end if it is 1200 watts. Always check the kernels and add 30-second bursts if they still feel firm, because ear size and wattage change the time.
Can you microwave corn on the cob in the husk?
Yes, and it is the easiest method. Leave the husk on, trim the long dry silk at the tip, rinse the husk, and place the ear directly on the turntable. The husk traps steam and acts like a natural steamer bag. After cooking, cut off the stem end and squeeze the ear out: the silk usually comes off with the husk in one pull.
Can you microwave corn on the cob without the husk?
Yes. Wrap each shucked ear in a damp paper towel and microwave on high for 2 to 4 minutes per ear. The towel replaces the husk and keeps the kernels moist. You can also lay shucked ears in a covered dish with 2 to 3 tablespoons of water and cook for 4 to 6 minutes for two to four ears.
Do you need to add water when microwaving corn on the cob?
Not if the corn is in its husk, because the husk and the kernels hold enough moisture to make steam. For shucked corn, yes: use a damp paper towel or add 2 to 3 tablespoons of water to a covered dish. Without added moisture, shucked kernels dry out and turn chewy.
Can you microwave frozen corn on the cob?
Yes. Frozen ears need 5 to 8 minutes for two ears on high, which is about 2 to 3 minutes longer than fresh ears. Wrap shucked frozen ears in a damp paper towel or cook them in a covered dish with water, and turn them halfway through so they heat evenly. No thawing is needed, and you should not thaw frozen corn at room temperature for hours before cooking it.
How do you microwave corn on the cob without it drying out?
Keep moisture around the kernels. Cook husk-on corn with the husk intact, or wrap shucked corn in a damp paper towel, or use a covered dish with a little water. Do not cook a bare, uncovered ear, because the microwave pulls moisture straight out of the kernels. Also avoid overcooking: check the corn early and add time in 30-second bursts.
Can you microwave corn on the cob in plastic wrap?
You can, but only with plastic wrap that is labeled microwave safe, and only with a small vent left open so steam can escape. A tightly sealed wrap can trap steam and burst, and wrap not rated for microwave use can melt onto the food. A damp paper towel is simpler and safer, so it is the method this guide recommends.
Is microwaved corn on the cob healthy?
Yes. Corn itself has fiber, vitamin C, B vitamins, and magnesium, and microwaving preserves nutrients well because it cooks fast with very little water. The health question is mostly about toppings: one tablespoon of butter adds about 100 calories. Use a light hand with butter, or try lime juice, herbs, or olive oil instead.
Can you reheat corn on the cob in the microwave?
Yes. Wrap a leftover cooked ear in a damp paper towel and microwave on high for 45 to 60 seconds. For several ears, use a covered dish with a tablespoon of water and cook for 1 to 2 minutes. Reheat corn only once, and heat it until it is steaming hot all the way through.
How many ears of corn can you microwave at once?
Four ears is the practical limit. Cook them in a single layer, not stacked, so the heat reaches every ear. More than four ears leads to cold spots in the middle of the pile and uneven cooking. If you need more than four ears, cook them in batches or boil a large pot instead.
Why did my microwaved corn come out chewy?
Chewy corn usually means lost moisture, not the wrong time. The most common cause is cooking a shucked ear with no wrap or cover, so the kernels dried out. The fix is to wrap the ear in a damp paper towel or cook it in a covered dish with water. Overcooking can also make corn tough, so check it early next time and pull it out as soon as the kernels are tender.
Can you microwave corn on the cob with butter on it?
Yes. You can spread butter on a shucked ear before wrapping it in a damp towel, or add butter to a covered dish with the corn. The butter melts as the corn cooks and coats the kernels evenly. Most people add butter after cooking, while the corn is still steaming hot, because it melts instantly and is easier to spread evenly.
How do you get the silk off microwaved corn?
Cook the corn in its husk, then cut off about 1 inch from the stem end and squeeze the ear out of the husk from the silk end. The steam loosens the silk, and most of it comes off with the husk in one pull. If a few strands stick to the kernels, wipe them off with a damp paper towel or a clean kitchen towel while the corn is still warm.
Microwaving corn on the cob is one of those small kitchen skills that pays off every summer. Once you know the time for your microwave and the size of ear you usually buy, the whole thing takes less than 5 minutes: husk on, cook, rest, squeeze, season. Keep the moisture in, check early, rest before serving, and the corn will come out sweet, tender, and juicy every time.

2 Comments
Pingback: Can You Microwave Brussels Sprouts? Times and Safety
Pingback: Can You Microwave Asparagus? Times and Safety