

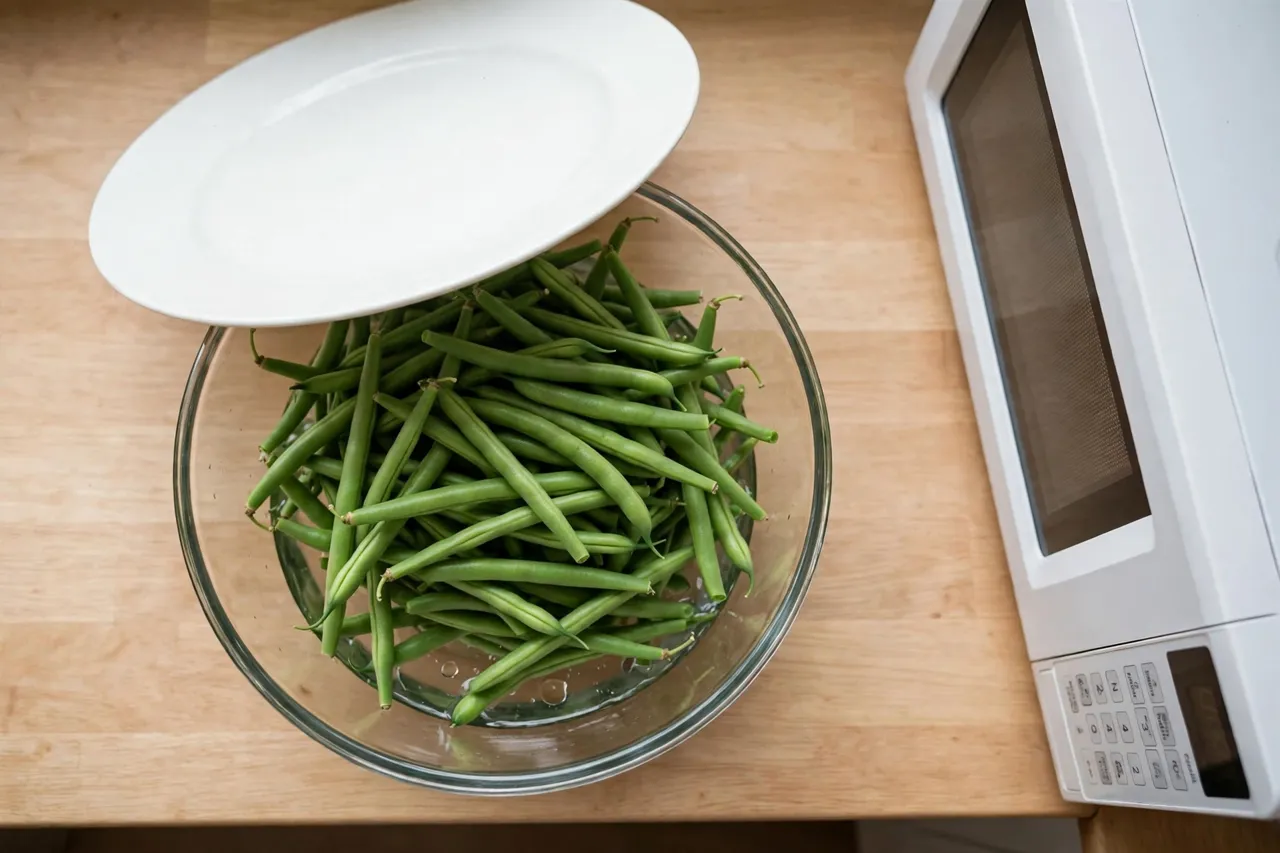
Yes, you can microwave green beans, and for a small batch it is one of the fastest ways to get a tender, bright green side dish on the table. Fresh green beans cook in 3 to 6 minutes on high, frozen beans take 6 to 8 minutes, and all you need is a microwave-safe dish, a tablespoon or two of water, and a loose cover. The microwave steams the beans in their own moisture, so you skip the pot, the steamer basket, and most of the cleanup. The method is simple, but the details matter: green beans go from crisp and tender to limp and dull in about 30 seconds, uneven pieces cook unevenly, and too much water turns a good handful into a soggy mess. This guide covers the step by step method, timing charts by amount, type, and wattage, frozen and canned beans, steam-in-bag packs, the soggy and wrinkly problems, colour loss, what microwaving does to nutrients, reheating, seasoning ideas, and the safety rules that keep every batch safe.
Can You Microwave Green Beans? The Short Answer
Yes. Trim the ends off fresh green beans, rinse them, and place them in a microwave-safe dish. Add 2 tablespoons of water, cover loosely with a microwave-safe lid or plate, and cook on high for 4 to 6 minutes, checking after 3 minutes. Let the dish rest covered for 1 minute, then test a bean by biting one. It should be bright green and tender with a slight bite, not soft all the way through. Drain any leftover water, season, and serve right away.
That short answer works in most home kitchens, but the range of times you see online is wide for a reason. Some guides say 3 minutes, others say 6 minutes, and both can be right in their own kitchen. Bean thickness, how many beans you cook at once, starting temperature, and microwave wattage all change the result. A small bowl of thin beans in a 1200-watt oven can be done in under 3 minutes, while a full pound of thick beans in a 700-watt oven can need 8 minutes or more. The rest of this guide gives you starting times plus the checks that tell you when the beans are actually done, so you are not guessing.
If you are new to microwave cooking in general, our main guide to can you microwave it explains which foods and containers are safe and which ones to keep out of the oven. Green beans sit firmly in the safe group, and they are one of the vegetables the microwave handles best.
Why the Microwave Works Well for Green Beans
Green beans are a good match for microwave cooking because they are mostly water, and microwaves heat water directly. When you trap that heat under a loose cover, the beans steam in their own moisture in a few minutes. There is no pot of boiling water to watch, no steamer basket to set up, and the beans stay in one dish from start to finish. That is the whole appeal: a green vegetable side dish in under 6 minutes with one dish to wash.
Speed is not the only advantage. Short cooking with little water is also kind to nutrients. Green beans are a source of vitamin C, vitamin K, folate, and fibre, and the water-soluble vitamins in that list are the ones most easily lost into cooking water. Boiling a pound of beans for 7 minutes in a full pot gives those vitamins plenty of time and water to escape. Microwaving for 4 minutes with 2 tablespoons of water gives them almost nowhere to go. The principle is simple and widely supported: cooking methods that minimise time, temperature, and water help vegetables retain the most nutrients, and microwaving fits that description well. This does not mean microwaving is magic, and it does not mean boiling is bad for you. It means that for a vegetable you want tender and bright, the microwave is a sensible choice rather than a lazy one.
The microwave also gives you control that the hob does not. You cook in short bursts, you check, and you stop the moment the beans are right. On the hob, a pot keeps boiling while you reach for the colander, and the difference between tender and mushy can pass in the time it takes to drain the water. In the microwave, the timer stops the heat the instant you press the button.
None of this means the microwave is perfect for green beans. It will never give you the charred edges of roasting or the browned flavour of a hot pan, and it will punish you for overcooking in seconds rather than minutes. But for a quick weeknight side dish, it is hard to beat, and the rest of this guide is about getting the small details right so the result is bright, tender, and worth serving.
How to Microwave Green Beans Step by Step
Follow these steps exactly the first time, then adjust the timing to your own microwave once you know how it behaves.
Step 1: Choose fresh beans. Pick beans that are bright green and firm, with a smooth skin and no brown spots, soft patches, or shrivelled ends. The bean should snap cleanly when you bend it. If it bends without snapping, it is old, and old beans turn limp and wrinkly in the microwave no matter how careful you are. Avoid beans with bulging seeds showing through the pod, because those are mature beans that cook unevenly and taste starchy.
Step 2: Wash the beans. Rinse the beans under cold running water and shake off the excess. The thin film of water left on the skins is useful, because it is the first moisture that turns to steam once the microwave starts. Do not dry the beans with a towel. A quick shake is enough.
Step 3: Trim the ends. Snap or cut off the stem end of each bean, and trim the tail end if it looks dry or brown. You do not need to string green beans any more, because modern varieties are bred without the tough string, but if you find a string when you snap the end, pull it away. Keep the beans whole if they are similar in size. If some beans are much thicker than others, slice the thick ones in half lengthwise so everything cooks at the same rate. You can also cut the beans into 2-inch pieces if you prefer, but whole beans hold their colour and texture a little better.
Step 4: Add a little water. Place the beans in a wide, shallow microwave-safe dish and add 2 tablespoons of water for every 1 to 2 cups of beans. Use a dish that lets the beans sit in a thin layer rather than a deep pile, because a single layer heats far more evenly. Glass and ceramic dishes work best. Do not use a metal dish, and do not use a plastic container unless it is labelled microwave-safe.
Step 5: Cover loosely. Cover the dish with a microwave-safe lid, a ceramic plate, or a sheet of microwave-safe plastic wrap with a corner turned back to vent. The cover traps steam, which is what actually cooks the beans. Never seal the dish completely shut, because steam needs somewhere to go. A plate resting on top of the bowl is the simplest cover, and it works well.
Step 6: Microwave on high in short bursts. Cook on high for 3 minutes first, then check. Stir the beans or shake the dish, and test one bean. If it is still too firm, cook in 30 to 60 second bursts, checking after each one, until the beans are bright green and tender with a slight bite. Starting short and adding time is the whole secret, because you can always add 30 seconds but you cannot undo 30 seconds of overcooking.
Step 7: Rest, then drain. Let the dish rest covered for 1 minute after the microwave stops. The beans keep cooking gently in the trapped steam during this rest, and the heat evens out across the dish. Then lift the cover away from your face, because the steam is hot, and drain any water left in the bottom of the dish right away. Beans left sitting in hot water keep softening, and that is how a perfect batch turns soggy on the plate.
Step 8: Season after cooking. Season the beans only after they come out of the microwave. Salt added before cooking can draw moisture out of the beans and make the texture uneven. A knob of butter, a drizzle of olive oil, a squeeze of lemon, and a pinch of flaky salt is all most batches need. Garlic, toasted almonds, and parmesan all work too, and the seasoning section below has more ideas.
Microwave Times for Green Beans
There is no single correct time for microwaving green beans, because the result depends on how many beans you cook, how thick they are, and how powerful your microwave is. The tables below give starting times for a 1000-watt microwave with a covered dish and 2 tablespoons of water. Always start at the low end of the range, check, and add time in 30-second bursts. The first time you cook a new batch size, treat the table as a guess and your fork as the judge.
Fresh green beans by amount (1000 watts, high power):
| Amount | Water | Time on high | Result |
|---|---|---|---|
| 1 cup (about 120 g) | 1 tablespoon | 3 to 4 minutes | Crisp and tender |
| 2 cups (about 240 g) | 2 tablespoons | 4 to 5 minutes | Crisp and tender |
| 3 cups (about 360 g) | 2 tablespoons | 5 to 7 minutes | Tender, check early |
| Half a pound (about 220 g) | 2 tablespoons | 4 minutes | Crisp and tender |
| 1 pound (about 450 g) | 3 tablespoons | 6 minutes | Tender, stir halfway |
| 2 pounds (about 900 g) | 3 to 4 tablespoons | 6 to 8 minutes | Tender, cook in two batches if possible |
Large batches are the hardest to get right, because the beans in the middle of the pile get less energy than the beans on the edges. If you are cooking a full pound or more, stir the beans halfway through and expect the time to run a little longer than the table says. For the most even result, cook big amounts in two smaller batches rather than one crowded dish. The second batch only takes a few minutes, and both batches will be better than one uneven one.
Fresh green beans by microwave wattage (half a pound, about 220 g):
| Microwave wattage | Half a pound | 1 pound |
|---|---|---|
| 600 watts | 6 minutes 40 seconds | 10 minutes |
| 700 watts | 6 minutes | 9 minutes |
| 800 watts | 5 minutes | 8 minutes |
| 900 watts | 4 minutes 40 seconds | 7 minutes |
| 1000 watts | 4 minutes | 6 minutes |
| 1100 watts | 3 minutes 20 seconds | 5 minutes |
| 1200 watts | 2 minutes 40 seconds | 4 minutes |
If you do not know your microwave wattage, check the label inside the door or the manual. As a rough rule, a 700-watt oven needs about 30 to 40 percent more time than a 1000-watt oven, and a 1200-watt oven needs about 15 percent less. When in doubt, start with the time for a weaker oven and check early. Checking costs you 10 seconds, and overcooking costs you the whole batch.
Green beans by type (1000 watts, high power):
| Type | Time on high | Notes |
|---|---|---|
| Fresh standard green beans | 4 to 6 minutes | The baseline for most recipes |
| Fresh haricots verts (thin French beans) | 3 to 4 minutes | Very thin, check at 2 minutes for crisp beans |
| Fresh Romano beans (flat Italian beans) | 5 to 7 minutes | Wider and denser, slice thick ones in half |
| Fresh yellow wax beans | 4 to 6 minutes | Same timing as green beans |
| Frozen whole green beans (10 oz) | 6 to 8 minutes | No thawing, stir halfway |
| Frozen cut green beans (2 cups) | 4 to 6 minutes | Smaller pieces cook faster |
| Canned green beans, drained (15 oz) | 2 to 3 minutes | Already cooked, you are only heating them |
| Steam-in-bag green beans | Per package directions | Usually 3 to 5 minutes, rest 1 minute |
These times assume a covered dish. Cooking uncovered dries the beans out and adds a minute or two, because the steam escapes instead of cooking the beans. If your beans are still firm after the table time, the usual causes are a low-wattage microwave, a very full dish, or beans that were cold from the fridge. Add 30 seconds at a time and test a bean after each round.
Can You Microwave Frozen Green Beans?
Yes, frozen green beans microwave well, and they are one of the easiest frozen vegetables to get right. Frozen beans are blanched before freezing, so they are already partly cooked, and you are mostly heating them through and finishing the texture. Place the frozen beans straight from the bag into a microwave-safe dish, add 1 to 2 tablespoons of water, cover loosely, and microwave on high. A 10-ounce bag of whole frozen beans usually takes 6 to 8 minutes, and 2 cups of frozen cut beans usually takes 4 to 6 minutes. Stir halfway through, because frozen beans thaw unevenly and the beans on the edges heat faster than the ones in the middle.
Do not thaw frozen green beans before microwaving. Thawing lets the beans sit in their own water and go soft before the cooking even starts, which is how frozen beans end up soggy. Cook them straight from frozen, and drain the dish as soon as the beans are hot. Frozen beans release more water than fresh beans, so if you skip the drain step the beans will sit in a puddle and keep softening.
Steam-in-bag frozen beans are a separate case. Those bags are designed for the microwave, and you should follow the directions printed on the bag, including whether to leave the bag sealed or to pierce it first. Do not microwave a frozen vegetable bag unless the packaging says it is microwave-safe. A regular freezer bag can melt, split, or release chemicals into the food, and it will not vent steam the way a steam bag does. If the bag is not labelled for the microwave, tip the beans into a dish and cook them the normal way. For more on frozen vegetables in general, see our guide to can you microwave frozen vegetables.
Frozen beans have one real weakness in the microwave: overcooking turns them mushy faster than fresh beans do, because the freezing and blanching have already softened the cell walls. Start at the low end of the time range, check at 4 minutes, and add 30 seconds at a time. When the beans are hot all the way through and still have a little bite, stop. A minute too long is the difference between a bright side dish and a grey, soft pile.
Can You Microwave Canned Green Beans?
Yes, canned green beans are the easiest of all to microwave, because they are already fully cooked and you are only heating them. Open the can, drain the liquid, and tip the beans into a microwave-safe bowl. Microwave on high for 2 to 3 minutes for a standard 15-ounce can, stirring once halfway through. They are ready when they are hot all the way through.
There are two things to get right with canned beans. First, always drain them before heating. The canning liquid is salty and cloudy, and heating the beans in it makes them taste flat and look dull. Second, do not overheat them. Canned beans are already soft, so 3 minutes is plenty, and longer cooking just makes them softer and greyer. If you want them to taste better, drain them, heat them, then toss them with a little butter, garlic, and lemon juice after they come out. That finishing step makes a real difference to canned beans, which can taste tired straight from the can.
Never microwave green beans in the can itself. Metal cans must never go in a microwave, because the metal reflects the microwaves, can spark, and can damage the oven. Always transfer the beans to a glass or ceramic bowl first. The same rule applies to any canned food, and it is one of the few microwave rules with no exceptions.
Can You Microwave Green Beans Without Water?
You can, but the result is usually worse. Green beans microwaved with no added water rely on the moisture inside the beans alone, and that is often not enough to steam them evenly. The beans on the outside of the pile dry out and wrinkle, while the beans in the middle stay firm, and the whole dish can end up chewy rather than tender. A single tablespoon of water fixes this, because it creates the steam that cooks the beans gently and evenly.
The one situation where no added water works is freshly washed beans that are still wet from rinsing. If you rinse the beans and put them straight into the dish without shaking them dry, the water clinging to the skins is often enough for a small batch of 1 cup or less. For anything larger, add the water. It costs nothing and it protects the texture.
If you are trying to avoid water because you want roasted or browned beans, the microwave is the wrong tool for that job. Microwaving is a steaming method, so it will never give you a sear or a charred edge. The better approach is to microwave the beans for 2 minutes to cook them most of the way, then finish them in a very hot skillet with oil for 60 seconds. That gives you tender beans with a browned outside, and it is faster than cooking them on the hob from raw.
Can You Microwave Green Beans in a Bag?
It depends on the bag. Steam-in-bag green beans sold in the freezer aisle are made for the microwave, and you can cook them in the bag by following the printed directions. Those bags have a vent that lets steam escape in a controlled way, and they are made from plastic that is rated for microwave heat. Cook them for the time on the package, usually 3 to 5 minutes, then let the bag rest for 1 minute before you open it. Open the bag away from your face, because the steam inside is very hot.
Do not microwave green beans in a regular plastic bag, a zip-top bag, or a grocery bag. Ordinary plastic bags are not made for microwave heat, and they can melt, split, or release chemicals into the food. The USDA and food safety guidance is clear on this point: only use plastic containers and wraps that are specifically labelled microwave-safe, and never use a bag that is not labelled for the purpose. If you have loose frozen beans in a plain freezer bag, tip them into a glass or ceramic dish and cook them there.
Plastic wrap needs the same care. If you cover the dish with plastic wrap, use wrap that is labelled microwave-safe, and leave a corner turned back so steam can escape. Never let plastic wrap touch the food directly during cooking, and never seal a dish completely shut with it. A ceramic plate or a microwave-safe lid is simpler, safer, and reusable, and it does the same job.
Why Microwaved Green Beans Go Soggy, Mushy, or Wrinkly
Soggy, mushy, and wrinkly beans are three different problems with three different causes, and knowing which one you have tells you how to fix it next time.
Soggy beans are the most common problem, and the cause is almost always too much water. When beans sit in a pool at the bottom of the dish, they boil instead of steam, and boiling makes them waterlogged. Use only 2 tablespoons of water for a normal batch, use a wide shallow dish so the water spreads thin, and drain the dish the moment the beans are done. If your beans came out soggy, pour off the liquid right away and spread the beans on a plate so the steam can escape. For the next batch, cut the water to 1 tablespoon and check a minute earlier.
Mushy beans come from overcooking. Green beans have a narrow window between tender and mushy, and in a microwave that window can be as short as 30 seconds. The cell walls that give the bean its snap break down quickly once the bean is fully cooked, and the longer the heat continues, the softer the bean gets. The fix is to check early and stop while the beans still have a slight squeak when you bite one. If the beans are already mushy, do not throw them away. Fold them into a saucy dish such as a casserole, a pasta sauce, or a soup, where a softer texture blends in and nobody notices.
Wrinkly beans are the opposite problem, and they come from cooking without enough moisture. When beans lose water faster than they absorb steam, the skins shrink and wrinkle, and the beans taste dry and chewy. This usually happens when the dish is uncovered, when no water was added, or when a small batch was cooked for too long. The fix is to add the water, keep the cover on, and shorten the time. A quick rinse under cold water and a toss with butter or oil after cooking can rescue mildly wrinkled beans, but badly dried beans will stay chewy.
Uneven cooking shows up as a mix of very soft beans and others that still taste raw. The causes are a crowded dish, beans of different thicknesses in the same bowl, and hot spots in the microwave. Fix it by arranging the beans in a shallow layer, keeping quantities moderate, stirring halfway through, and splitting beans of very different sizes into two batches or slicing the thickest ones in half lengthwise. A turntable helps, but it does not replace stirring.
Why Do Microwaved Green Beans Lose Their Bright Green Colour?
Fresh green beans are bright green because of chlorophyll, the pigment in the plant, and chlorophyll is sensitive to heat, time, and acid. When beans cook too long, the heat breaks the chlorophyll down and the colour shifts from bright green to olive, then to a dull yellow-green. That colour change is the most reliable visible sign that the beans are overcooked, and once it happens the colour will not come back.
Three things protect the colour. The first is short cooking. Check the beans early and stop as soon as they are tender, because every extra minute costs colour as well as texture. The second is a quick finish. Rest the dish uncovered for 1 minute after cooking so the steam escapes, and if you are not serving the beans right away, spread them on a plate or plunge them into a bowl of ice water for 30 seconds to stop the cooking. The third is to keep acid away until serving. Lemon juice and vinegar added before cooking speed up colour loss, because acid attacks chlorophyll. Season with lemon only after the beans are on the plate, and the green will stay bright.
Too much water also dulls the colour, because it dilutes the pigment and leaches it into the cooking liquid. That is another reason to use only a tablespoon or two of water. The beans should look bright green the moment you lift the cover, and if they look olive, the batch was cooked too long or with too much water.
Does Microwaving Green Beans Destroy Nutrients?
No, microwaving does not destroy the nutrients in green beans, and for most nutrients it preserves them better than boiling does. Green beans contain vitamin C, vitamin K, folate, and fibre, and vitamin C and the B vitamins are water-soluble, which means they dissolve into cooking water and are lost when that water is thrown away. Boiling beans in a full pot for 7 minutes gives those vitamins plenty of water and time to escape. Microwaving for 4 minutes with 2 tablespoons of water gives them almost nowhere to go, because there is very little water to dissolve into and the cooking time is short.
Harvard Health has covered this point in its guidance on microwave cooking and nutrition, noting that cooking methods which minimise time, temperature, and water help vegetables retain the most nutrients, and that microwaving fits that description well. The key point is that no cooking method preserves every nutrient perfectly. Heat breaks down some vitamin C in any method, and that is normal. The question is which method loses the least, and for green beans the microwave is one of the best options, alongside steaming.
There are two simple ways to keep even more nutrients in the beans. First, keep the cooking time short and check early, because longer cooking loses more vitamins as well as more colour and texture. Second, use the small amount of cooking water rather than throwing it away, for example by tossing the beans in it with a little butter, because that water holds some of the dissolved vitamins. The amounts involved are small, so do not overthink it. The practical takeaway is simple: microwaved green beans are a nutritious side dish, and you are not ruining them by cooking them in the microwave.
How to Reheat Green Beans in the Microwave
Yes, you can reheat cooked green beans in the microwave, and it takes very little time. Place a single serving in a microwave-safe dish, sprinkle a teaspoon of water over the beans to stop them drying out, cover loosely, and microwave on high for 30 to 45 seconds. Stir, then heat for another 30 seconds if needed. Most portions are warm through in 60 to 90 seconds in total.
Reheat cooked beans only once. A second reheating turns them mushy and dull, because each round of heating breaks the cell walls down further. If you have a large amount of leftover beans, it is often better to use them cold in a salad, chopped into pasta, or stirred into a grain bowl than to reheat the whole batch. Leftover cooked green beans keep in an airtight container in the fridge for up to 4 days, and they should not sit at room temperature for more than 2 hours. If you are reheating beans as part of a mixed dish with meat, poultry, or eggs, heat the dish until it is steaming hot all the way through, because the USDA advises heating leftovers to 165 degrees Fahrenheit (74 degrees Celsius) to destroy harmful bacteria.
Green Bean Types: Which Ones Microwave Best?
Not all green beans are the same, and the type changes the timing and the result. The most common types are standard string beans, haricots verts, Romano beans, and yellow wax beans, and each one behaves a little differently in the microwave.
Standard string beans are the beans most shops sell, and they are the baseline for this guide. They are about a quarter inch thick, they cook in 4 to 6 minutes, and they are forgiving of small timing mistakes. If you are not sure which type you have, assume standard string beans and use the times in the table above.
Haricots verts are thin French beans, about half the thickness of standard beans, and they cook much faster. They need 3 to 4 minutes on high, and for a crisp result you should check them at 2 minutes. They are the best choice if you like a firm, snappy bean, but they are also the easiest to overcook, so watch them closely. If your haricots verts are very thin, start with 2 minutes and add 30 seconds at a time.
Romano beans are flat Italian beans, wider and denser than standard beans, and they need 5 to 7 minutes. Slice the thickest ones in half lengthwise before cooking so they cook evenly, and stir them halfway through. Romano beans hold their shape well when cooked, and they are good with olive oil, garlic, and tomato.
Yellow wax beans look like green beans but are yellow, and they cook exactly like standard green beans, in 4 to 6 minutes. They taste a little milder and sweeter than green beans, and they are a good choice if you want a different colour on the plate. You can mix green and yellow beans in the same dish, because they cook at the same rate.
Whatever type you buy, the same rules apply: choose firm beans that snap, trim the ends, keep the pieces even in size, use a little water, cover loosely, and check early. The type changes the minutes, not the method.
Seasoning and Serving Ideas
Green beans need very little seasoning to taste good, and the best flavours are the simple ones. The golden rule is to season after cooking, not before, because salt added before cooking can draw moisture out and make the texture uneven, and acid added before cooking dulls the colour. Cook the beans plain, drain them, and then dress them while they are still hot so the flavours stick.
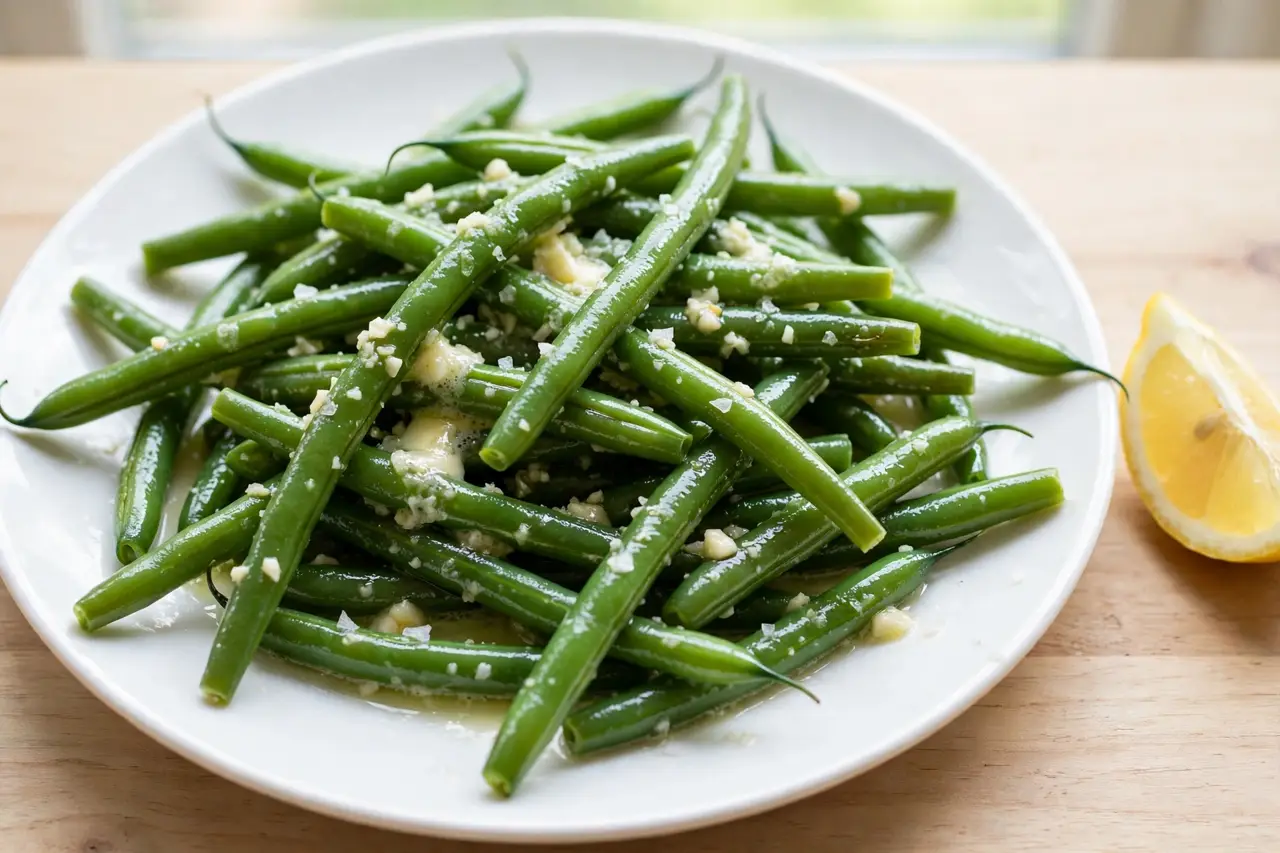
Butter and lemon. The classic finish. Toss the hot beans with a knob of butter, a squeeze of lemon juice, and a pinch of flaky salt. The butter adds richness, the lemon adds brightness, and the salt brings the two together. This is the finish to use when the beans are the main side dish and you want them to taste clean and fresh.
Garlic and olive oil. Warm a tablespoon of olive oil with a clove of minced garlic for 30 seconds in the microwave, then toss it through the hot beans with a pinch of chilli flakes. The garlic should be fragrant, not browned, and the oil should coat the beans lightly rather than pooling at the bottom of the plate.
Toasted almonds and parmesan. Toss the beans with a handful of flaked almonds toasted in a dry pan, a grating of parmesan, and a drizzle of olive oil. The almonds add crunch, the parmesan adds salt and savoury flavour, and the combination turns a plain vegetable into something that feels finished. This is a good choice for a holiday table or a dinner party.
Soy, sesame, and ginger. Toss the hot beans with a teaspoon of soy sauce, a few drops of sesame oil, a pinch of grated ginger, and a sprinkle of sesame seeds. The beans pick up the flavour quickly, and the combination works well with rice, noodles, and grilled chicken or fish.
Green beans with bacon. Cook the beans plain in the microwave, then toss them with a few rashers of crisp bacon crumbled over the top. The bacon adds salt and smoke, and the beans stay bright and tender underneath. Cook the bacon separately, because bacon needs a different method, and add it at the end.
Green beans go with almost any main dish, from roast chicken and grilled fish to pasta and rice bowls. A pound of beans serves about four people as a side dish, and a small bowl of beans with butter and lemon is one of the quickest healthy sides you can make on a busy night.
Microwave vs Other Cooking Methods
The microwave is not the only way to cook green beans, and it is not always the best way. Each method has strengths, and the right choice depends on what you want from the beans and how much time you have.
| Method | Time | Texture | Best for |
|---|---|---|---|
| Microwave | 4 to 6 minutes | Tender and crisp, bright green | Quick weeknight side dishes |
| Steaming on the hob | 5 to 7 minutes | Tender and crisp, bright green | Large batches, even cooking |
| Boiling | 5 to 7 minutes | Tender, can go soft quickly | Blanching before freezing or roasting |
| Sauteing in a pan | 8 to 10 minutes | Tender with browned spots | Flavour, garlic and butter finishes |
| Roasting in the oven | 15 to 20 minutes | Tender with charred edges | Caramelised flavour, holiday meals |
| Air fryer | 8 to 10 minutes | Crisp and slightly shrivelled | Snack-style beans, crispy texture |
Microwaving and steaming give the most similar results, because both cook the beans gently in steam. Steaming on the hob is better for large batches, because a big pot holds more beans evenly than a microwave dish does, and it is the method to choose when you are cooking for a crowd. Boiling is the fastest way to blanch beans before freezing, but it loses the most nutrients into the water, so it is not the best choice for a side dish you plan to eat right away.
Sauteing and roasting give you flavour the microwave cannot, because they brown the outside of the beans. If you want that flavour, the best approach is often to combine methods: microwave the beans for 2 minutes to cook them most of the way, then finish them in a hot pan or under the grill for a minute or two. You get the speed of the microwave and the flavour of the pan, and the beans stay tender inside. For a plain daily side dish, though, the microwave on its own is hard to beat, and it is the method most people will use most often.
If you like this kind of quick vegetable guide, our articles on can you microwave broccoli and can you microwave cauliflower use the same short-burst, check-early method, and can you microwave Brussels sprouts covers another vegetable that cooks well in the microwave.
Food Safety Rules for Microwaving Green Beans
Green beans are a low-risk food in the microwave, because they are a plain vegetable with no meat, dairy, or eggs involved, and they are served hot straight after cooking. Even so, the standard microwave safety rules apply, and they are worth following every time.
Use a microwave-safe dish. Glass and ceramic dishes are safe. Metal dishes, foil, and containers with metal trim must never go in a microwave. Plastic containers are safe only if they are labelled microwave-safe. When in doubt, use glass.
Cover loosely and vent the steam. A loose cover traps the steam that cooks the beans, and a vent lets the pressure escape. Never seal a dish completely shut, and never heat a sealed bag or container that is not designed for the microwave.
Stir halfway through. The USDA warns that microwave ovens can cook unevenly and leave cold spots where harmful bacteria can survive, and it advises stirring, rotating, or turning food midway through the cooking time to even the cooking out. This matters most for mixed dishes and leftovers, but it is a good habit for vegetables too, because it also evens out the texture. Even if your microwave has a turntable, stirring still helps.
Observe the standing time. After the microwave stops, the food keeps cooking for a short time as the heat evens out. The USDA calls this standing time, and it advises letting food rest before you test it or serve it. For green beans, 1 minute of rest covered is enough, and it also finishes the cooking gently.
Watch out for steam burns. The steam trapped under the cover is very hot. Lift the cover away from your face, open steam bags away from your body, and use oven gloves or a towel to lift the dish out, because the dish itself will be hot too.
Do not leave cooked beans out. Cooked green beans should not sit at room temperature for more than 2 hours. Put leftovers in the fridge in an airtight container, and use them within 4 days. If you reheat beans that were part of a mixed dish with meat or eggs, heat the dish until it is steaming hot all the way through, aiming for 165 degrees Fahrenheit (74 degrees Celsius) as the USDA advises for reheated leftovers. For the full USDA guidance on microwave cooking, see the USDA Food Safety and Inspection Service page on cooking safely in the microwave, and Clemson University Extension has a clear summary of the same rules in its microwave food safety fact sheet. Harvard Health also explains how microwave cooking affects nutrition in vegetables.
Frequently Asked Questions
These are the questions people ask most often about microwaving green beans, answered directly.
How long do you microwave green beans?
Fresh green beans take 4 to 6 minutes on high in a 1000-watt microwave, with 2 tablespoons of water in a covered dish. Start checking at 3 minutes, then add 30-second bursts until the beans are bright green and tender with a slight bite. Half a pound takes about 4 minutes, and a full pound takes about 6 minutes.
Can you microwave frozen green beans?
Yes, cook frozen green beans straight from the bag with no thawing. A 10-ounce bag of whole frozen beans takes 6 to 8 minutes on high, and 2 cups of frozen cut beans takes 4 to 6 minutes. Add 1 to 2 tablespoons of water, cover loosely, stir halfway through, and drain the dish as soon as the beans are hot.
Can you microwave canned green beans?
Yes, canned green beans only need heating, because they are already cooked. Drain the liquid, tip the beans into a microwave-safe bowl, and microwave on high for 2 to 3 minutes. Never microwave the beans in the can itself, because metal must never go in a microwave.
Do you need to add water when microwaving green beans?
Yes, add 2 tablespoons of water for every 1 to 2 cups of beans. The water creates the steam that cooks the beans evenly and keeps them from drying out and wrinkling. Freshly washed beans that are still wet from rinsing carry enough water for a very small batch, but for anything larger, add the water.
Should you cover green beans in the microwave?
Yes, always cover the dish loosely with a microwave-safe lid, a ceramic plate, or vented microwave-safe plastic wrap. The cover traps steam, which is what cooks the beans, and it keeps the moisture in. Never seal the dish completely shut, because the steam needs somewhere to go.
Why are my microwaved green beans mushy?
Overcooking is the cause. Green beans go from tender to mushy in about 30 seconds in a microwave, so check early and stop while the beans still have a slight squeak when you bite one. If the beans are already mushy, fold them into a saucy dish such as a casserole or pasta sauce, where a softer texture blends in.
Why are my microwaved green beans wrinkly?
Wrinkly beans have lost too much moisture, usually because they were cooked uncovered, with no added water, or for too long. Add 2 tablespoons of water, keep the cover on, and shorten the cooking time. A quick rinse and a toss with butter or oil can rescue mildly wrinkled beans.
Why did my green beans turn olive or brown in the microwave?
The beans were overcooked, or acid was added before cooking. Heat breaks down chlorophyll, the pigment that makes beans green, and lemon juice or vinegar speeds that up. Cook the beans briefly, check early, and season with lemon only after they are on the plate. Once the colour is gone, it will not come back.
Can you microwave green beans in a plastic bag?
Only if the bag is a steam-in-bag pack made for the microwave, and only by following the directions on the package. Do not microwave green beans in a regular plastic bag, a zip-top bag, or a grocery bag, because ordinary plastic can melt, split, or release chemicals into the food. Tip loose beans into a glass or ceramic dish instead.
Can you microwave haricots verts?
Yes, haricots verts are thin French green beans, and they microwave in 3 to 4 minutes on high. Check them at 2 minutes, because they are thin and they overcook quickly. Use the same method as standard beans: a little water, a loose cover, and short bursts.
Can you microwave green beans with butter and garlic?
Yes, but add the butter and garlic after cooking, not before. Toss the hot beans with a knob of butter and a clove of minced garlic, or warm the garlic in a tablespoon of olive oil for 30 seconds and toss it through the beans. Adding butter before cooking does not hurt the beans, but the flavour is better when it is added fresh at the end.
How do you keep green beans bright green in the microwave?
Cook them briefly, check early, and do not add acid before cooking. Short cooking protects the chlorophyll that gives beans their green colour, and lemon juice or vinegar added before cooking speeds up colour loss. Use only a little water, rest the dish uncovered for 1 minute after cooking, and season with lemon only after the beans are on the plate.
Is it safe to microwave green beans?
Yes, microwaving green beans is safe when you use a microwave-safe dish, cover the food loosely, and stir halfway through for even heating. The USDA advises stirring, rotating, and resting microwaved food, because microwaves can leave cold spots. For plain vegetables the risk is low, but the habits are good to build. Watch out for steam burns when you lift the cover, and never use metal containers or foil in the microwave.
Can you reheat green beans in the microwave?
Yes, reheat cooked green beans in the microwave for 30 to 45 seconds on high for a single serving, covered loosely, with a teaspoon of water sprinkled over them. Most portions are warm through in 60 to 90 seconds in total. Reheat only once, because a second reheating turns the beans mushy and dull.
Green beans have a reputation for being fussy, but in the microwave they are one of the easiest vegetables to cook well, as long as you respect the three rules that matter most. Use only a tablespoon or two of water so the beans steam instead of boil, keep the pieces even in size so every bean cooks at the same rate, and check with a fork early instead of trusting the clock. Get those three right and you get bright green, tender beans in under 6 minutes with one dish to wash. Cook them fresh, season them simply with butter and lemon, and serve them hot, and the green vegetable that used to feel like a chore becomes an easy weeknight side dish. If you want to cook more vegetables the same way, our guide to corn on the cob uses the same short-burst, check-early method, and our frozen vegetables guide covers the bags and boxes in your freezer.
