

Yes, you can microwave cheese, and for most everyday jobs it works well. Shredded cheddar on nachos, a slice on a sandwich, or a spoonful of cream cheese softened for a spread all come out fine when you use short bursts, medium power, and a microwave safe dish. The trouble starts only when cheese is heated too fast, too long, or in the wrong container. Then it turns rubbery, splits into a pool of oil, or dries out into a hard disc.
This guide covers the safe method step by step, which cheeses melt well and which ones resist melting, how long each form takes, what to do when cheese goes oily, and the packaging mistakes to avoid. Safety claims follow guidance from USDA-backed microwave food safety material and university extension services, with the honest note that cheese itself is a ready to eat food, so the main risks here are burns, splatter, and bad texture, not undercooking in the way raw meat would be.
The Short Answer
Yes, you can microwave cheese safely if you shred or slice it first, place it in a microwave safe bowl or on a microwave safe plate, cover it loosely, heat it at about 50 percent power in 15 to 30 second bursts, and stir between bursts. Stop as soon as it looks mostly melted, because carryover heat finishes the job. Never microwave cheese in foil, in a metal container, or in packaging that is not labeled microwave safe, and never leave it unattended while it heats. Most servings need only 30 to 90 seconds in total.
Why Cheese Turns Rubbery or Oily in the Microwave
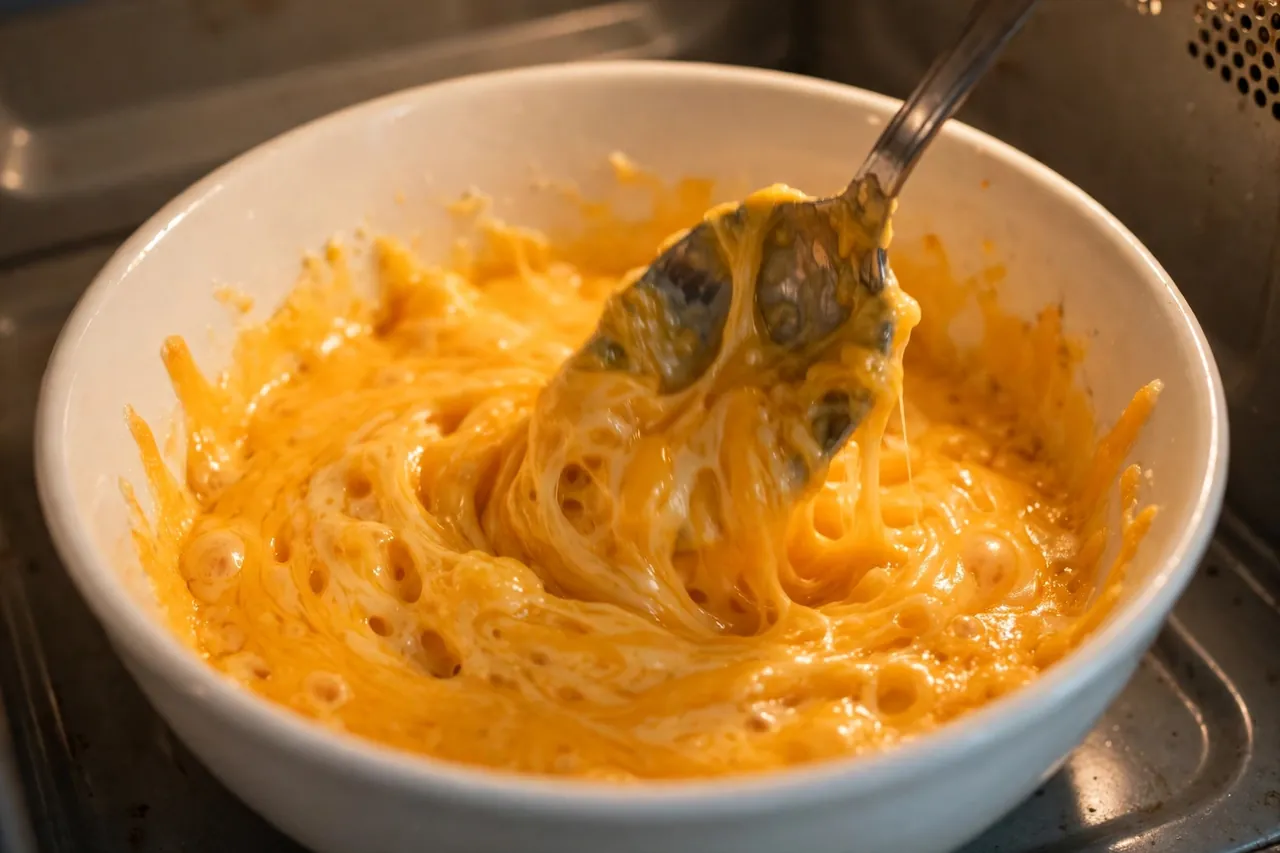
Cheese is a tight network of milk protein, mainly casein, holding fat and water together. Gentle heat loosens that network, so the cheese softens and flows. Strong heat squeezes it instead. The proteins tighten, push the fat out, and leave behind a tough, rubbery lump sitting in oil. That is why a full minute on high power so often ruins a bowl of cheese that would have melted beautifully in three short bursts at half power.
Microwaves also heat unevenly. Fatty spots heat faster than watery spots, and the edges of a pile heat faster than the center. Stirring between bursts is not a fussy extra step. It is the step that moves hot spots around, lets cooler parts catch up, and stops one corner from overcooking while another stays cold. The same uneven heating is why microwave food safety guidance from university extension services stresses covering, stirring or rotating, and standing time after heating, so heat can even out before you eat.
Which Cheeses Melt Well and Which Ones Do Not
Not every cheese is built to melt, and knowing the difference saves a lot of disappointment. Young, moist, high fat cheeses melt into a smooth pool. Aged, dry, low fat, or acid set cheeses tend to soften, crumble, or go grainy instead. That is a property of the cheese, not a failure of your microwave.
Good melters include mozzarella, Monterey Jack, young cheddar, Colby, provolone, Swiss, Gouda, Fontina, Gruyere, and American cheese slices. American slices deserve a special note, because they contain emulsifiers that help them stay smooth, which is why they melt so evenly on a burger. Fair melters, which need gentle heat and a little added liquid, include aged cheddar, aged Gouda, and cream cheese. Poor melters, which usually stay crumbly or firm, include feta, halloumi, paneer, ricotta, cottage cheese, Parmesan, Pecorino, and fresh goat cheese. Halloumi and paneer are meant to hold their shape when heated, so expecting them to melt like mozzarella will always end in frustration.
Low fat cheese is another weak melter. With less fat to keep the protein network soft, it dries out and turns leathery fast. If you only have low fat cheese, use the lowest power setting, add a teaspoon of milk per cup, and stop early. Full fat cheese is more forgiving in the microwave in every way.
The Safe Method, Step by Step
Follow these steps in order. The whole routine takes two or three minutes, and the stirring steps matter more than the exact seconds.
Step 1: Shred, slice, or cube the cheese
Cut the cheese into small, even pieces before it goes in. Shredded cheese melts fastest, thin slices come next, and small cubes work for a sauce. A whole block melts from the outside in, so the outside overcooks before the center softens. If you are shredding a soft block, chill it in the freezer for 10 to 15 minutes first, because cold cheese grates more cleanly.
Step 2: Choose a microwave safe bowl or plate
Use a plain glass or ceramic bowl for melting cheese for a sauce or dip, because the sides hold the melted cheese in. Use a flat microwave safe plate for cheese on toast, nachos, or a sandwich topping. Do not use metal, foil, or a container with metallic trim. For help choosing containers, see our guides to microwaving glass and microwaving plastic.
Step 3: Add a little liquid for sauces
For a cheese sauce or dip, add about one teaspoon of milk or water per cup of shredded cheese before heating. The extra moisture gives the proteins something to hold onto and slows down oil separation. For cheese melted directly on food, like nachos, skip the liquid, because the food underneath already supplies moisture.
Step 4: Cover loosely, with a vent
Cover the bowl loosely with a microwave safe lid, an inverted plate, or a damp paper towel, leaving a small gap for steam to escape. A loose cover traps enough steam to help the cheese melt evenly, without building up pressure. Do not seal the bowl tight, and do not let plastic wrap touch the cheese while it heats.
Step 5: Heat at 50 percent power in short bursts
Set the microwave to 50 percent power, or medium, and heat for 15 to 30 seconds. Stir well, then repeat. Most single servings melt in two to four bursts. If your microwave has no power setting, use 15 second bursts on high with stirring between them, and stop sooner. The goal is cheese that is soft and just flowing, not bubbling hard.
Step 6: Stir, stand, and use at once
Give the cheese a final stir, then let it stand for 30 seconds to one minute. Standing time lets the temperature even out, which matters for both texture and safety, because the center of a thick pile can be much hotter than the surface. Use melted cheese at once, because it firms up fast as it cools. If it stiffens, a 10 second burst, with stirring, usually brings it back.
How Long to Microwave Cheese: Timing by Form
Times vary with wattage, amount, and cheese type, so treat these as starting points, then adjust by 10 to 15 seconds at a time. A 1000 watt microwave runs hotter than a 700 watt model, so start at the low end if your oven is powerful.
For one cup of shredded mozzarella or cheddar in a bowl at 50 percent power, start with 30 seconds, stir, then add 15 second bursts until smooth. Total time is usually 60 to 90 seconds. For two slices of cheese on bread or a sandwich, 20 to 30 seconds at 50 percent power is usually enough, because the bread insulates the cheese and it keeps melting after the microwave stops. For two tablespoons of cream cheese to soften for spreading, 10 to 15 seconds at 50 percent power is plenty. Any longer, and it turns runny and separates. For a single serve cheese sauce made from one cup of shredded cheese plus a splash of milk, plan on 90 seconds to two minutes in total, in bursts, with stirring after every burst.
For cheese crisps, which are a different job entirely, spread small mounds of shredded Parmesan or cheddar on parchment paper on a microwave safe plate and heat on high for about one to two minutes, watching closely. They crisp as they cool, so take them out when they look golden at the edges, not dark brown. This is the one case where high power and a longer single burst make sense, because you want the fat to render out and the cheese to dry into a wafer.
Slices, Blocks, Shredded, and String Cheese
Each form of cheese behaves a little differently, and a small change in preparation fixes most problems.
Sliced cheese is the easiest form to microwave, because it is already thin and even. Lay slices flat, without folding them into thick stacks, and heat them on the food they are topping rather than alone on a plate, where they can stick. A single slice on a sandwich needs only 15 to 25 seconds at half power.
Block cheese needs shredding or cubing first, as described above. Never try to melt a whole block in the microwave, because the outside will go oily long before the inside softens. If you only need a small amount, cut off what you need and return the rest to the fridge, wrapped tightly.
Bagged shredded cheese melts less smoothly than cheese you shred yourself, because most bagged shreds are coated with anti caking agents such as cellulose powder to stop clumping. Those agents also resist melting, so the result can look grainy even with perfect technique. If smooth texture matters, for a sauce or a fondue style dip, shred a block yourself. If you are topping nachos or pizza, bagged shreds are fine, because the other ingredients hide the slight graininess.
String cheese, which is low moisture mozzarella, can be microwaved, but it needs the same gentle treatment. Peel it into thin strands or chop it first, then heat in 15 second bursts at half power. A whole string cheese stick heated on high tends to puff, split, and go rubbery in the middle while staying cool at the ends.
Cream Cheese, Brie, and Soft Cheeses
Cream cheese is a special case, because it softens fast and separates faster. To soften a block for spreading or baking, leave it in its foil wrapper out of the microwave, remove the wrapper, place the block on a microwave safe plate, and heat for 10 to 15 seconds at half power. Check it by pressing gently. It should give under pressure but still hold its shape. If you need it fully melted into a sauce, cube it, add a splash of milk or cream, and heat in 15 second bursts with stirring.
Brie and Camembert soften beautifully in the microwave, but they also run everywhere if you overdo it. For a whole small wheel, score the top rind lightly, place it on a microwave safe plate, and heat for 20 to 30 seconds at half power, then check. The center should feel soft when pressed, not liquid. Let it stand for a minute before cutting, because the inside keeps softening. For a wedge, 15 to 20 seconds is usually enough.
Fresh goat cheese and feta will soften and warm up, but they will not turn into a smooth melted pool, no matter how long you heat them. That is normal for acid set cheeses. Warm them briefly if you want them soft on a salad or toast, but do not chase a melt that the cheese cannot give you. Ricotta and cottage cheese behave the same way, warming up and loosening slightly, but staying grainy.
Packaging Mistakes: What Never Goes in the Microwave
The cheese itself is safe to microwave, but its packaging often is not. This is where most real safety problems come from.
Never microwave cheese in foil. Foil can spark, arc, and in a worst case start a fire, and even a small piece of foil wrapper left on a slice is enough to cause arcing. Always unwrap cheese fully before heating, and check for foil seals or tabs. The same rule applies to any packaging with a metallic layer or metallic print.
Never microwave cheese in its original plastic wrapper unless that wrapper is clearly labeled microwave safe, which most cheese wrappers are not. Transfer the cheese to a glass or ceramic dish first. The same applies to vacuum sealed bags, wax paper wraps with a plastic coating, and single use tubs. A tub that held cold cheese is not automatically safe for hot cheese.
Plastic wrap needs care too. If you cover a bowl with plastic wrap, keep the wrap from touching the cheese, and vent one corner so steam can escape. Better still, use a microwave safe lid or an inverted plate as a cover. And never microwave cheese in a container with a metal clasp, a metal rim, or a decorative metallic band.
One more packaging trap is the cheese sauce pouch or the processed cheese pack that says microwaveable. Follow the exact label directions for that product, including standing time and venting, because the manufacturer tested that exact pouch. Do not copy those directions onto a different product.
Reheating Food That Contains Cheese
Reheating a cheesy leftover is a little different from melting fresh cheese, because the rest of the dish sets the safety rules. Plain melted cheese is ready to eat and needs no minimum temperature, but a leftover dish that contains meat, poultry, or eggs must be reheated until it is steaming hot all the way through. USDA-backed microwave safety guidance puts 165 degrees Fahrenheit as the target for reheating leftovers and for foods cooked in a microwave that contain animal products, with a standing time of at least two to three minutes after heating so the temperature can even out.
In practice, that means a slice of leftover pizza, a portion of macaroni cheese, or a cheesy pasta bake should be heated in bursts, stirred or rotated if possible, covered loosely, and left to stand covered for two minutes before eating. Check the center, not just the cheese on top, because cheese on the surface melts fast and can look hot while the middle is still cool. If you are reheating a cheesy dish with chicken or another meat, that center check is the safety step, not the melted cheese on top.
Do not reheat a cheesy leftover more than once, and do not leave it sitting at room temperature for more than two hours in total. Refrigerate leftovers promptly in shallow containers, and reheat only the portion you will eat. Cheese itself keeps well in the fridge, but a cooked cheesy dish follows the same leftover rules as any other cooked food.
When the Microwave Is the Wrong Tool
The microwave is fast, but it is not the best tool for every cheese job. If you want browned, bubbling cheese on top of a casserole, a golden crust on French onion soup, or crisp edges on a grilled cheese sandwich, the oven or a skillet will beat the microwave every time. Microwaves heat without browning, so microwave cheese stays pale and soft, even when it is fully melted.
A grilled cheese sandwich made only in the microwave is a good example. The cheese melts, but the bread stays soft and pale, and the sandwich can turn soggy as steam builds up. A better hybrid is to melt the cheese in the microwave for 20 seconds, then finish the sandwich in a dry skillet for a minute per side for crisp bread. You get the speed of the microwave and the texture of the skillet.
For a large cheese sauce, the stovetop is also the better tool. A saucepan over low heat, with constant stirring and a splash of milk or cream, gives you more control and a smoother result than a microwave, especially for larger batches. The microwave wins for single servings, quick nachos, and softening small amounts. The stovetop wins for dinner party quantities.
Fixing Cheese That Went Wrong
Most cheese mistakes are fixable if you catch them early, and the fixes are simple.
If the cheese turned oily, it overheated. Take it off the heat at once, let it cool for a minute, then stir vigorously. A splash of warm milk, stirred in a little at a time, can help bring a sauce back together. If the cheese has already formed a hard lump, it is past saving as a sauce, but it can still be chopped and used as a topping, where texture matters less.
If the cheese turned rubbery, it also overheated, and it will not go back to smooth. Stop heating, let it cool slightly, and use it in a cooked dish where it will be chopped or mixed in, such as scrambled eggs or a baked pasta, rather than serving it on its own. Next time, cut the power in half and halve the burst length.
If the cheese stayed grainy, the cause is usually bagged shreds, low fat cheese, or a poor melter like feta. Stir in a little milk or cream and heat gently, but accept that some graininess will stay. For a smoother result next time, shred a block of full fat cheese yourself and add a pinch of cornstarch tossed through the shreds before heating, which helps hold the sauce together.
If the cheese dried out into a hard disc, it heated too long without a cover. Next time, cover loosely, add a teaspoon of liquid, and stop as soon as the cheese looks soft, because it keeps melting during standing time. Scraping up a dried disc is rarely worth it, so start a fresh small batch instead.
Easy Uses for Microwaved Cheese
Microwaved cheese earns its place in a busy kitchen in a few reliable jobs. Nachos are the classic one. Spread tortilla chips in a single layer on a microwave safe plate, scatter shredded cheese over them, and heat for 30 to 60 seconds at half power until just melted. Add cold toppings after heating, not before, so they stay fresh. Warm the tortilla chips on their own first if they feel stale, then add the cheese, so the base stays crisp.

A quick cheese sauce for vegetables is another strong use. Melt one cup of shredded cheddar with two tablespoons of milk in a bowl, in bursts, stirring between each, until smooth. Pour it over steamed broccoli, cauliflower, or a bowl of microwaved frozen vegetables. A pinch of mustard powder or a dash of hot sauce stirred in at the end lifts the flavor without any extra cooking.
Softening cheese for a sandwich or a wrap is the fastest job of all. A slice on bread needs 15 to 25 seconds, and a spoonful of cream cheese for a bagel needs 10 seconds. You can also soften butter in the same session for toast, but heat the butter separately, because butter melts far faster than cheese and will be liquid before the cheese softens. For a fuller breakfast, pair the sandwich with a slice of microwaved bread warmed on its own, not under the cheese, so it does not go soggy.
Cheese crisps round out the list. Small mounds of shredded hard cheese on parchment paper, heated on high until golden, cool into crisp wafers for salads, soups, or snacking. Watch them closely, because the gap between golden and burnt is about 15 seconds. Let them cool fully on the plate before lifting them, because they are soft while hot and crisp as they cool.
Frequently Asked Questions
These are the questions people actually ask about microwaving cheese, answered directly first, with the detail after.
Can you microwave cheese?
Yes, you can microwave cheese safely. Shred or slice it first, use a microwave safe bowl or plate, cover loosely, heat at about 50 percent power in 15 to 30 second bursts, and stir between bursts. Stop as soon as it looks mostly melted.
Can you microwave cheese slices?
Yes, cheese slices are one of the easiest forms to microwave. Lay them flat on the food they are topping, heat for 15 to 30 seconds at half power, and let them stand for 30 seconds. Do not stack slices into a thick pile, because the outside will overcook before the inside melts.
Can you microwave shredded cheese?
Yes, shredded cheese melts fastest of all forms. Heat one cup at 50 percent power for 30 seconds, stir, then add 15 second bursts until smooth. Cheese shredded from a block melts more smoothly than bagged shreds, which carry anti caking agents that can make the result grainy.
Can you microwave cheese in its wrapper?
No, never microwave cheese in its wrapper unless the wrapper is clearly labeled microwave safe, which most cheese wrappers are not. Unwrap the cheese fully, check for foil seals or tabs, and transfer it to a glass or ceramic dish before heating.
Can you microwave cheese in foil?
No, never microwave cheese in foil. Foil can spark and arc in a microwave and can start a fire. Remove all foil, including small seals and tabs, before the cheese goes anywhere near the microwave.
Why does microwaved cheese go rubbery?
Cheese goes rubbery when it is overheated. Strong heat squeezes the protein network tight, pushes the fat out, and leaves a tough lump in oil. Heat at half power in short bursts, stir between bursts, and stop as soon as the cheese looks mostly melted, because carryover heat finishes the job.
Why does microwaved cheese go oily?
Cheese goes oily for the same reason it goes rubbery, which is overheating. When the proteins tighten too far, they release the fat they were holding. Let the cheese cool for a minute, stir vigorously, and add a splash of warm milk a little at a time to help a sauce come back together.
Can you microwave cream cheese?
Yes, but cream cheese needs very gentle heat. To soften a block, remove the foil wrapper, place it on a microwave safe plate, and heat for 10 to 15 seconds at half power. For a sauce, cube it, add a splash of milk, and heat in 15 second bursts with stirring. Any longer, and it separates.
Can you microwave mozzarella cheese?
Yes, mozzarella is one of the best cheeses for the microwave. Low moisture mozzarella melts smoothly and stretches well. Shred it or tear it into small pieces, heat at half power in 15 to 30 second bursts, and stir between bursts. Fresh mozzarella in water should be drained first, then patted dry.
Can you microwave feta cheese?
You can warm feta cheese, but it will not melt into a smooth pool. Feta is an acid set cheese that stays crumbly when heated. Heat it briefly, for 15 to 20 seconds at half power, if you want it soft on a salad or toast, but do not expect it to behave like cheddar or mozzarella.
Can you microwave cheese on pizza?
Yes, you can reheat pizza in the microwave, and the cheese will melt in 30 to 60 seconds. The trade off is texture, because the crust goes soft instead of crisp. For a crisper result, reheat the slice in a dry skillet or an oven instead, and use the microwave only when speed matters more than crunch.
How long do you microwave cheese for nachos?
For a single layer of nachos, heat for 30 to 60 seconds at half power, then check. The cheese should look just melted, not bubbling hard. Thicker layers need longer, but they also melt unevenly, so spread the chips in a single layer and heat in two batches if you are feeding more than one person.
Is microwaved cheese safe to eat?
Yes, microwaved cheese is safe to eat when it is heated in a microwave safe container and handled hot with care. Cheese is a ready to eat food, so there is no minimum cooking temperature for plain cheese itself. For dishes that also contain meat, poultry, or eggs, reheat until steaming hot all the way through, and let the dish stand covered for two minutes before eating.
Can you microwave cheese twice?
You can reheat melted cheese once, briefly, but each round of heating makes the texture worse. Cheese that has been melted, cooled, and reheated tends to go oily and grainy. Melt only the amount you need, and if you must reheat, use 10 to 15 second bursts at half power with stirring.
The Bottom Line
Microwaving cheese is safe, fast, and reliable when you respect one rule, which is gentle heat. Shred or slice the cheese, use a microwave safe dish, cover loosely, heat at half power in short bursts, stir between bursts, and stop early. Good melters like mozzarella, cheddar, and Monterey Jack will reward that care with a smooth, gooey result. Poor melters like feta and halloumi will stay firm no matter what you do, and that is the cheese, not your technique.
Keep foil and unmarked packaging out of the microwave, let cheesy leftovers stand covered for two minutes after reheating, and use the stovetop or oven when you want browning and crunch. For the full map of what else is safe in your microwave, start with our main guide to what you can microwave, which links every food and material we have covered.
Sources: the USDA-backed USDA publication Microwave Ovens and Food Safety, which advises covering, stirring or rotating, and a standing time of at least three minutes after microwave cooking; the University of Nebraska Lincoln microwave safety guide, which gives the same covering, stirring, and standing time advice; the University of Minnesota Extension safe food temperatures page, which lists 165 degrees Fahrenheit for microwave cooking and reheating leftovers; The Takeout on why cheese goes oily in the microwave, which explains how overheating makes casein proteins release fat; and Food Blog Alliance on melting cheese in the microwave, which recommends shredding, a little liquid, and 15 to 20 second bursts at medium power.
