

Yes, you can microwave canned beans, and for most weeknight meals it is the fastest safe way to heat them. Transfer the beans to a microwave safe bowl, cover the bowl loosely, heat in short bursts, stir halfway through, and serve them steaming hot. Do not heat beans in the metal can, and do not seal the bowl tight, because both mistakes turn a simple job into a mess or a safety problem.
Canned beans are already cooked during canning, so microwaving them is reheating, not raw cooking. That is good news for busy cooks, because you only need to warm them evenly and keep them moist. It is also why timing matters more than power. A short, stirred heat gives you soft, evenly warm beans. A long, unstirred blast gives you a hot edge, a cold centre, dry skins, and splatter all over the microwave.
This guide covers the full method, exact times for one can and for larger portions, what to do with the can liquid, how refried beans and baked beans differ, how to fix dry, mushy, bland, or splattered beans, and how to store leftovers safely. If you only need the quick answer, the box below and the step list are enough. If you want beans that taste like you cooked them on purpose, read the sections on liquid, stirring, and flavour.
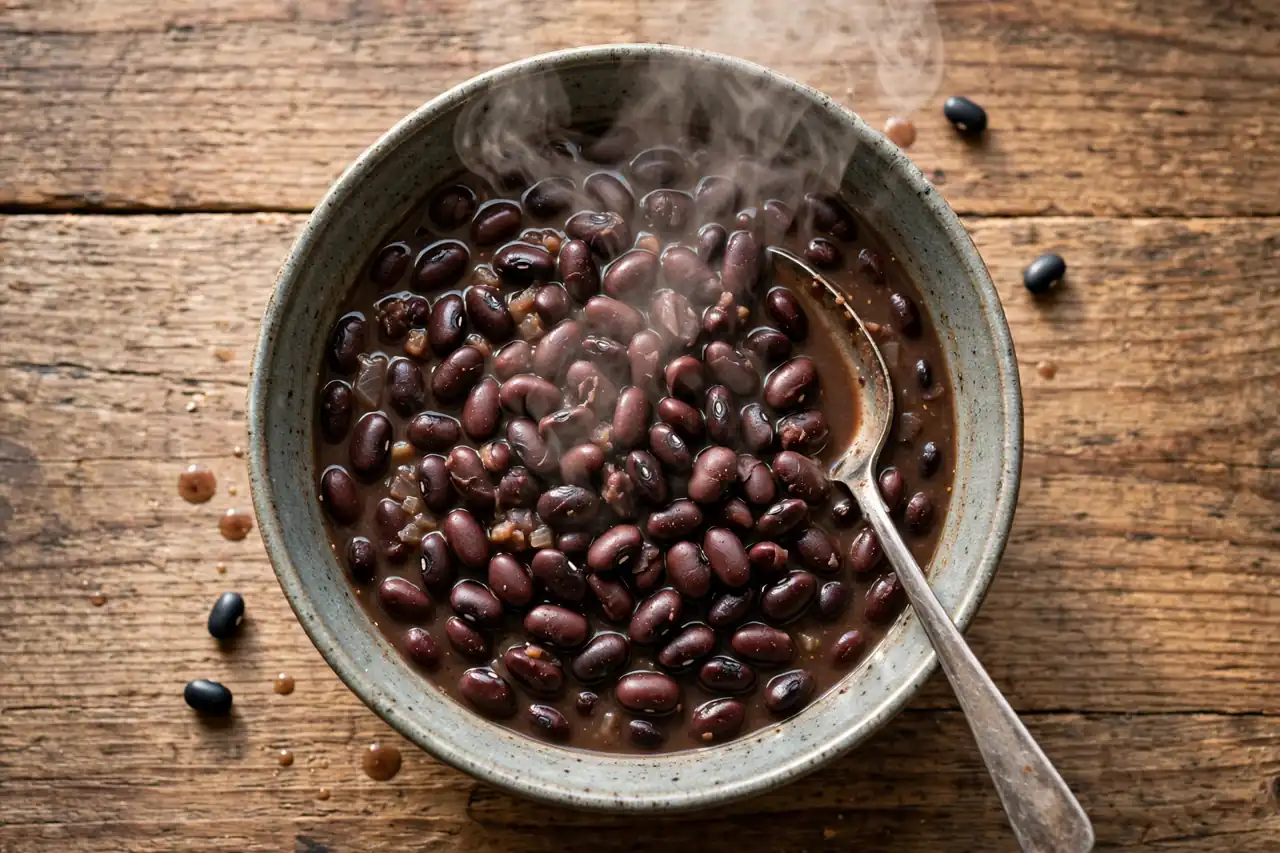
Short answer: can you microwave canned beans?
Yes. Canned beans microwave safely when you follow three rules. First, move the beans out of the can into a glass or ceramic bowl that is labelled microwave safe. Second, add a little liquid if the beans look dry, and cover the bowl loosely so steam can escape. Third, heat in 60 to 90 second bursts, stir between bursts, and stop when the beans are steaming hot all the way through. For one standard can, that usually takes 2 to 3 minutes on high in a 1000 watt microwave, plus 1 minute of standing time.
The one hard rule is the can itself. Metal reflects microwaves, heats unevenly, and can spark or damage the oven. The United States Food and Drug Administration notes that metal pans and foil should generally not be used in a microwave, because microwaves reflect off metal and food can cook unevenly. That advice applies directly to a metal bean can. Open the can, tip the beans into a bowl, recycle or discard the can, and microwave only the bowl.
For leftovers and reheated beans, use a food thermometer when you can. The United States Department of Agriculture advises reheating leftovers to 165 degrees Fahrenheit (74 degrees Celsius), measured with a food thermometer, and covering food in the microwave while rotating or stirring it for even heating. Steam and bubbling at the edge are not proof that the centre is hot, so stir well and check more than one spot if the beans will be served to children, older adults, or anyone who is pregnant.
Why canned beans work so well in the microwave
Canned beans are soft, wet, and already cooked, which is exactly what microwaves handle well. Microwaves heat water in food, and beans carry plenty of moisture inside and around them. That moisture turns to steam, warms the beans from within the dish, and keeps the texture soft, provided you do not drive all the moisture out with too much time on high.
The same moisture is also the reason beans splatter. As steam builds inside a bean or under a tight cover, pressure escapes suddenly and throws hot bean pieces across the oven. A loose cover solves most of that problem. It traps enough steam to heat evenly, but leaves a gap for excess steam to escape, so the bowl does not turn into a small pressure cooker.
Compared with the stovetop, the microwave wins on speed and washing up, and loses on browning and thickening. You will not get a crisp edge, a caramelised top, or a slowly reduced sauce in the microwave. You will get warm beans in about three minutes, in one bowl, with no pan to scrub. For tacos, rice bowls, toast, salads, and quick sides, that trade is usually worth it.
How to microwave canned beans, step by step
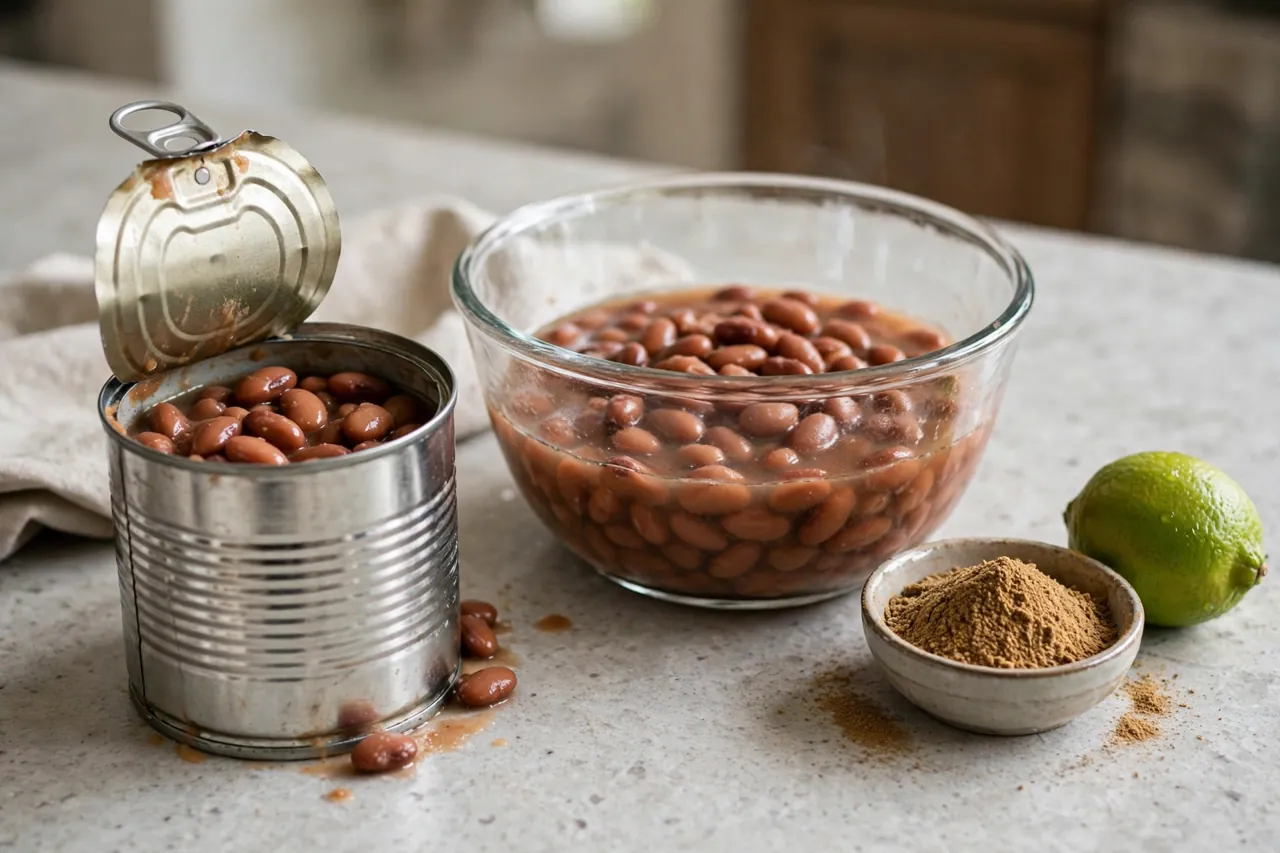
Start with a bowl that is larger than you think you need. Beans bubble and expand as they heat, and a bowl filled to the brim will spill even with a cover. For one 400 gram can, use a bowl that holds at least 700 millilitres. For two cans, use a large mixing bowl or heat the cans in two batches, because a crowded bowl heats unevenly and takes much longer.
Open the can and decide about the liquid. For whole beans such as kidney beans, black beans, chickpeas, and cannellini beans, drain the beans and rinse them briefly under cold water if you want less salt and a cleaner taste. Rinsing also removes some of the starchy liquid that can make the finished dish gluey. Then add back 2 to 3 tablespoons of fresh water or broth per can, so the beans have moisture to steam in. For beans in sauce, such as baked beans, do not drain them. The sauce is part of the dish, and draining it would leave you with dry beans and wasted flavour.
Tip the beans into the bowl and break up any large clumps with a fork. Add your seasonings now if you want the flavour to soak in, rather than sitting on top at the end. A pinch of salt, garlic powder, cumin, smoked paprika, or chilli powder works well, depending on the meal. Stir once so the seasoning and liquid are spread evenly, not pooled in one corner.
Cover the bowl loosely. A microwave safe lid left slightly ajar, an inverted microwave safe plate, or a damp paper towel all work. Do not seal a lid fully, and do not wrap the bowl tight with plastic wrap with no vent. Steam needs a way out. If you use plastic wrap, leave one corner open and keep the wrap from touching the beans.
Microwave on high for 60 to 90 seconds. Remove the bowl carefully with oven gloves, because the bowl itself gets hot from the food inside. Stir thoroughly, scraping the edges and the bottom, because microwaves leave cold spots. Return the bowl to the microwave, covered loosely again, and heat for another 60 to 90 seconds. Stir again, then let the beans stand, covered, for 1 minute. Standing time matters, because heat keeps spreading from the hot edges to the cooler centre during that minute.
Check that the beans are steaming hot throughout. If they are not, heat in 30 second bursts, stirring after each burst, until they are. Taste and adjust salt, acid, and fat at the end. A squeeze of lemon or lime, a drizzle of olive oil, or a spoonful of salsa added after heating often does more for flavour than extra cooking time.
Microwave times for canned beans
Times below are starting points for a 1000 watt microwave on high, for beans that start at room temperature or fridge temperature after draining. Lower wattage ovens need more time. Larger portions need more time, but not in direct proportion, because a deep, crowded bowl heats less evenly. Stirring and short bursts matter more than adding a full extra minute blindly.
| Amount | First heat | Stir, then second heat | Stand time |
|---|---|---|---|
| Half a can (about 200 grams) | 60 seconds | 30 to 60 seconds | 1 minute |
| One can (about 400 grams) | 90 seconds | 60 to 90 seconds | 1 minute |
| Two cans (about 800 grams) | 2 minutes | 1 to 2 minutes, in 60 second bursts | 2 minutes |
| Refried beans, one can | 60 seconds at 50 percent power | 60 seconds at 50 percent power, stir well | 1 minute |
| Baked beans in sauce, one can | 90 seconds | 60 to 90 seconds | 1 minute |
If your microwave is 700 to 800 watts, add about 30 percent to these times and keep the same stir pattern. If it is 1200 watts, start at the lower end and check early. Wattage is usually printed inside the door or in the manual. When in doubt, start short. You can always add 30 seconds, but you cannot undo rubbery, dried out beans.
Fridge cold beans straight from an opened can stored overnight need a little longer than room temperature beans, usually one extra 30 second burst. Frozen cooked beans are a different job. Thaw them in the fridge overnight when you can, then reheat as leftovers. If you reheat from frozen in the microwave, use medium power, stir often, and keep heating until the centre reaches steaming hot throughout, because the outside can boil while the centre stays frozen.
Should you drain and rinse canned beans?
For whole beans in water or brine, draining and rinsing is usually the better choice. The can liquid carries a lot of salt, and it can taste flat or slightly metallic. Rinsing gives you a cleaner bean flavour and a texture you can control, because you add back only the liquid you want. Many cooks also find rinsed beans easier on digestion, although rinsing does not remove all of the compounds that cause gas, and it can wash away a small amount of soluble fibre and minerals.
There is one case where you should keep the liquid. If you are making a soup, stew, chilli, or a thick bean dip, the starchy can liquid helps the dish thicken and taste richer. In that case, tip the whole can, liquid and all, into the bowl, and reduce any extra water you add. Taste before adding salt, because the liquid is already salty.
For baked beans, refried beans, beans in tomato sauce, and chilli beans, do not drain at all. The sauce is the recipe. Draining baked beans leaves dry beans in a thin puddle, and draining refried beans leaves a stiff paste that dries out fast. Heat those types as they come from the can, stir well, and add liquid only if they thicken too much during heating.
A practical rule covers most meals. If the label says beans in water, brine, or salted water, drain and rinse, then add 2 to 3 tablespoons of fresh water or broth. If the label says beans in sauce, tomato sauce, or chilli sauce, do not drain. If you are unsure, drain half the liquid, taste a bean, and decide. You can add liquid back in seconds, but you cannot easily remove a salty, starchy liquid once it is mixed in.
Different beans, different microwave handling
Black beans are forgiving in the microwave. They hold their shape, take seasoning well, and suit cumin, lime, garlic, and coriander. Drain and rinse them, add a splash of water, and heat as above. They are a strong choice for tacos, rice bowls, and nachos, because they stay distinct rather than turning to mush.
Kidney beans need one extra safety note, and it matters. Canned kidney beans are already cooked, so they are safe to heat and eat. Dried kidney beans are a different story, because undercooked dried kidney beans can cause stomach upset, and they must be boiled vigorously before eating. Never treat dried kidney beans like canned beans in the microwave. If your can says kidney beans, you are fine. If your bag says dried kidney beans, cook them fully on the stovetop or by a tested dried bean method first, then reheat the cooked beans in the microwave.
Chickpeas, also called garbanzo beans, stay firm and slightly nutty after microwaving. They need a little more liquid than black beans, because their skins can dry and split if heated with too little moisture. Add 3 tablespoons of water or broth per can, stir well, and do not overheat them if you plan to blend them into hummus later. Warm, not boiling hot, chickpeas blend smoother.
Cannellini beans and butter beans are soft and creamy, and they break down faster than chickpeas. Heat them gently, on medium power if your microwave tends to run hot, and stir with a light hand. Over stirring a hot bowl of butter beans turns them into mash, which is fine for a dip, but not what you want for a salad or a bean toast topping.
Refried beans need lower power and more stirring than whole beans. They are already mashed, so they trap steam in pockets and can erupt in hot blobs if heated on full power without stirring. Use 50 percent power, heat in 60 second bursts, and stir thoroughly after each burst, scraping the bottom and sides. Add water or milk, one tablespoon at a time, if the beans stiffen. A damp paper towel over the bowl catches splatter without sealing steam in.
Baked beans in sauce heat well, but they bubble and spit more than plain beans, because sugar in the sauce holds heat and thickens as it cooks. Use a larger bowl, cover loosely, and stir after every 60 to 90 seconds. Do not leave baked beans in the microwave for a single long stretch. Short bursts keep the sauce smooth instead of scorched at the edges and cold in the middle.
Why beans splatter, and how to stop it
Splatter is the most common microwave bean complaint, and it has a simple cause. Beans are small, sealed pockets of water and starch. When steam builds inside a bean faster than it can escape, the skin bursts and throws hot bean across the bowl. A tight cover makes it worse, because steam builds under the cover too, then escapes all at once when you lift it.
The fix is a combination of cover, power, and stirring. Cover loosely, not tightly. Heat in short bursts, not one long run. Stir between bursts, so hot and cool beans swap places and steam escapes in small amounts instead of one burst. For refried beans and baked beans, lower the power to 50 to 70 percent and stir more often, because thick foods trap steam more easily than loose whole beans.
If your beans still splatter, check three things. First, did you add enough liquid? Dry beans splatter more, because there is no surrounding moisture to absorb heat evenly. Second, is the bowl too small or too full? A shallow, wide bowl splatters less than a deep, narrow mug filled to the top. Third, did you skip stirring? Even one stir halfway through cuts splatter sharply, because it breaks up hot spots before they build pressure.
When you lift the cover, lift it away from your face and hands, and let the first puff of steam escape before you stir. Use oven gloves, because a glass bowl full of hot beans stays hot for several minutes. Wipe the microwave after beans, because dried bean splatter hardens fast and smells stale if left for days.
Fixes for dry, mushy, bland, or cold centred beans
Dry beans are almost always overcooked or under liquided, not a bad can. Add 2 tablespoons of warm water or broth, stir, cover loosely, and heat for 30 seconds. The beans will absorb some liquid during the stand time. For refried beans, add liquid one tablespoon at a time and stir until creamy, because too much liquid at once makes them soupy.
Mushy beans come from too much time, too much stirring, or too much liquid at the start. You cannot firm up fully broken beans, but you can rescue the dish. Drain off excess liquid, spread the beans on toast or in a wrap where texture matters less, or mash them fully on purpose with garlic, lemon, and olive oil for a quick bean dip. Next time, start with less liquid, use shorter bursts, and stir gently, not vigorously.
Bland beans usually need salt, acid, and fat, in that order. Taste first, add a pinch of salt, stir, and taste again. Then add acid, such as lemon juice, lime juice, or a splash of vinegar. Acid brightens beans without adding more salt. Finally, add fat, such as olive oil, butter, or a spoonful of salsa or yoghurt, for richness. Seasoning added before heating soaks in, but final seasoning added after heating gives you control, so do both in small amounts.
A cold centre with a boiling edge is a microwave cold spot, not a sign that the beans are bad. Stir thoroughly, spread the beans in a wider bowl, and heat in shorter bursts. Rotate the bowl halfway through if your microwave has no turntable. Check the temperature in two or three spots, not just at the edge, before serving.
Rubbery skins on chickpeas or kidney beans usually mean the beans dried out at the surface. Add liquid, cover loosely, and heat gently on medium power for the last minute, so steam softens the skins instead of high heat toughening them. A drizzle of oil after heating also helps skins feel softer on the tongue.
Five quick flavour ideas that work in the microwave
Mexican style black beans are the easiest upgrade. Drain and rinse one can of black beans, add 2 tablespoons of water, half a teaspoon of cumin, half a teaspoon of garlic powder, and a pinch of chilli powder. Heat, stir, and finish with lime juice and chopped coriander. Serve in tacos, over rice, or on toast with cheese. For a fuller meal, stir in sweetcorn after heating, because sweetcorn needs only the residual heat to warm through.
Mediterranean chickpeas suit salads and grain bowls. Drain and rinse chickpeas, add 3 tablespoons of water, a pinch of oregano, and a little lemon zest if you have it. Heat gently, then toss with olive oil, lemon juice, chopped parsley, and a pinch of salt. The beans stay warm while the herbs stay fresh, which is the contrast that makes this version work.
Smoky baked beans for toast need no extra cooking skill, only care with stirring. Heat baked beans in short bursts, stir well, and finish with a pinch of smoked paprika and black pepper. Serve on buttered toast with a fried or poached egg if you like. Do not add sugar, because canned baked beans are already sweet, and extra sugar makes them scorch faster.
Garlic butter butter beans are a soft, comforting side. Drain butter beans lightly, keeping 2 tablespoons of liquid, add a knob of butter and half a teaspoon of garlic powder, and heat gently. Stir once, stand for 1 minute, and finish with parsley and black pepper. This version pairs well with grilled vegetables, roast chicken, or crusty bread.
Quick bean soup from a can is a useful pantry meal. Tip one can of cannellini beans, liquid and all, into a large microwave safe bowl, add 200 millilitres of vegetable broth, a handful of chopped tomatoes, and a pinch of dried herbs. Heat in 90 second bursts, stirring between bursts, until steaming hot. Mash a few beans against the side of the bowl with a fork to thicken the soup, then finish with olive oil and salt. Check the soup temperature in the centre, because soups hide cold spots well.
What never to put in the microwave with beans
Never microwave beans in the can, even with the lid removed. Some online posts suggest removing the lid makes it safe, but that advice is wrong for a normal kitchen microwave. The can is metal, the edges are sharp, and the lining is not made for microwave heat. Transfer the beans first, every time, with no exceptions.
Do not use a plastic takeout container, a margarine tub, a single use yoghurt pot, or a container that is not labelled microwave safe. Those plastics can warp, melt, or soften in the heat of the food, and they are not made for repeated microwave use. Use glass, ceramic, or a plastic container that clearly says microwave safe, and check it for cracks or warping before use.
Do not seal the bowl tight with a lid, tight plastic wrap, or a plate pressed down hard with no gap. Sealed steam builds pressure, and the cover can pop off, spill hot beans, or burn your hand. Leave a vent every time. If you are unsure whether a lid vents, leave it slightly ajar.
Do not add metal to the bowl. No fork left in the bowl, no foil cover, no can opener, and no metal handled spoon left inside during heating. Remove utensils before you close the door. A forgotten fork will not improve the beans, and it can spark or damage the oven.
Do not microwave dried, unsoaked beans and expect a cooked result. Dried beans need soaking and long, even cooking in water, and microwaving dry beans gives you hard, uneven, and potentially unsafe beans, especially kidney beans. Cook dried beans fully first, then use the microwave only to reheat the cooked beans.
Storage, leftovers, and reheating beans again
Once a can is opened, move leftover beans to a clean, covered container and refrigerate promptly. Do not store opened beans in the can in the fridge. The can edge can harbour bacteria once opened, the beans pick up a metallic taste, and a damaged can lining is not a good storage container. A glass container with a lid is the simplest safe choice.
Use refrigerated leftover beans within 3 to 4 days, following the same leftover window the USDA gives for cooked foods. If you will not use them in that time, freeze them in a freezer safe container, leaving a little room for expansion. Frozen cooked beans keep well for quality for a few months, although they stay safe longer at a steady freezer temperature. Label the container with the bean type and the date, so you do not guess later.
Reheat leftover beans the same way as canned beans, with one change. Heat them until they reach 165 degrees Fahrenheit (74 degrees Celsius) throughout, stir well, and let them stand for 1 to 2 minutes before checking the temperature again. Reheat sauces and bean soups until they boil and steam throughout, not just at the edge. Reheat only the portion you will eat, because repeated cooling and reheating dries beans out and gives bacteria more chances to grow.
Throw beans away if they smell sour or off, look slimy, show mould, or have been left at room temperature for more than 2 hours. The smell test alone is not reliable for all bacteria, so when the storage history is unknown, or the beans have sat out through a long meal, discarding them is the safer choice. A can of beans is cheap. A stomach bug is not.
Check the can before you open it. Do not use beans from a can that is bulging, badly dented at a seam, leaking, rusty inside, or spurts when opened. Those signs can mean the seal failed or the contents spoiled, and heating will not make a damaged can safe. When in doubt, throw the can away unopened, or at least do not taste the contents to decide.
Microwave versus stovetop for canned beans
The stovetop gives you better control for thickening, browning, and flavour building. You can fry garlic and onion first, add beans, simmer gently, and reduce a sauce until it coats a spoon. You can also mash beans in the pan and adjust texture as you go. If you have time and want a sauce that tastes slow cooked, the stovetop is the better tool.
The microwave gives you speed, one bowl, and less washing up. It is better for a single portion, a quick lunch, a dorm room, an office kitchen, or a night when you do not want to watch a pan. It is also better for keeping beans moist, because a loose cover traps steam that a wide open pan loses.
A hybrid method often beats both. Heat the beans in the microwave until hot, then tip them into a hot pan for 1 minute with garlic, oil, or sauce to finish. You get microwave speed plus stovetop flavour, with no long simmer. For refried beans, the hybrid method is especially useful, because a quick pan finish after microwaving gives a smoother, richer texture than microwaving alone.
Nutrition does not change much between the two methods for canned beans. Rinsing reduces sodium more than the heating method does, and adding butter, cheese, or salty sauces changes the nutrition far more than the choice of microwave or pan. If sodium matters to you, choose no salt added beans, rinse whole beans, and season with herbs, acid, and spices instead of extra salt.
Common mistakes to avoid
The most common mistake is heating beans in the can, or heating them with no cover at all. The first risks sparks and oven damage. The second guarantees splatter and dry beans. Transfer to a bowl and cover loosely, every time, and both problems disappear.
The second mistake is one long heat with no stir. Microwaves heat unevenly, and a single 3 minute run leaves a boiling edge and a lukewarm centre. Short bursts with stirring give you even heat, better texture, and fewer surprises when you lift the cover.
The third mistake is too little liquid for whole beans, and too much liquid for refried beans. Whole beans need 2 to 3 tablespoons of added liquid after rinsing. Refried beans need liquid added a tablespoon at a time, because they thicken fast and turn soupy just as fast. Match the liquid to the bean type, not to a single rule for all cans.
The fourth mistake is seasoning only at the end, or only at the start. Season lightly before heating so flavour soaks in, then adjust salt, acid, and fat after heating so the final taste is balanced. Beans taste flat when they get salt alone, and they taste bright when salt, acid, and fat work together.
The fifth mistake is reheating the whole pot every time you want a spoonful. Each reheat dries beans and risks uneven heating. Heat only what you will eat, store the rest promptly in the fridge, and reheat leftovers once, thoroughly, to steaming hot throughout.
Quick checklist before you press start
Use this checklist when you are in a hurry. It covers the safety points that matter, without extra steps. Beans in a microwave safe bowl, not in the can. Bowl large enough for bubbling. Liquid added for whole beans, sauce kept for baked and refried beans. Cover loose, with a vent. Heat in short bursts, stir between bursts. Stand for 1 minute. Check steaming hot throughout. Season at the end. Store leftovers promptly in a covered container in the fridge.
If any step is missing, pause and fix it before heating. A missing cover means splatter. A missing stir means cold spots. A metal can means a safety risk. The checklist takes five seconds to run through, and it prevents almost every microwave bean failure.
Frequently asked questions
These are the questions readers ask most about microwaving canned beans, with a short direct answer first in each case, then the detail you need to get it right.
Can you microwave canned beans in the can?
No. Never microwave canned beans in the metal can, even with the lid removed. Transfer the beans to a microwave safe glass or ceramic bowl first, cover loosely, and heat in short bursts with stirring. Metal reflects microwaves, heats unevenly, and can spark or damage the oven.
How long do you microwave canned beans?
One can of canned beans usually takes 2 to 3 minutes on high in a 1000 watt microwave, heated in 60 to 90 second bursts with stirring between bursts, plus 1 minute of standing time. Half a can takes about 1 to 2 minutes, and two cans take about 3 to 4 minutes in bursts. Lower wattage ovens need more time, so check and stir rather than relying on time alone.
Should you drain canned beans before microwaving?
Drain and rinse whole beans in water or brine, such as black beans, kidney beans, chickpeas, and cannellini beans, then add back 2 to 3 tablespoons of fresh water or broth. Do not drain baked beans, refried beans, or beans in sauce, because the sauce is part of the dish. For soups and stews, keep the can liquid to help thicken the dish.
Can you microwave refried beans?
Yes, but use lower power and stir more often. Heat refried beans at 50 percent power in 60 second bursts, stirring thoroughly after each burst, until steaming hot. Add water or milk one tablespoon at a time if they stiffen. A damp paper towel over the bowl helps catch splatter without sealing steam in.
Can you microwave baked beans?
Yes. Heat baked beans in a large microwave safe bowl, covered loosely, in 60 to 90 second bursts with stirring between bursts. Baked beans bubble and spit more than plain beans, because the sugary sauce holds heat, so use a larger bowl and do not heat them in one long stretch.
Do canned beans need to reach a certain temperature?
For leftovers and reheated beans, the USDA advises reheating to 165 degrees Fahrenheit (74 degrees Celsius), measured with a food thermometer, and checking in several places because microwaves leave cold spots. For a freshly opened can heated for immediate eating, steaming hot throughout, with thorough stirring and a 1 minute stand, is the practical target, and a thermometer removes all doubt.
Why do my beans explode or splatter in the microwave?
Beans splatter when steam builds inside the beans or under a tight cover and escapes suddenly. Prevent it by covering loosely, heating in short bursts, stirring between bursts, and adding enough liquid. Dry beans, a too full bowl, and a sealed cover all make splatter worse.
Can you microwave dried beans?
No, do not microwave dried, unsoaked beans and expect them to cook. Dried beans need soaking and long cooking in water, and kidney beans in particular must be boiled vigorously when cooked from dried. Cook dried beans fully first, then reheat the cooked beans in the microwave using the canned bean method.
Can you microwave canned beans twice?
You can reheat leftover beans once, thoroughly, to steaming hot throughout, provided they were refrigerated promptly and used within 3 to 4 days. Reheat only the portion you will eat, stir well, and discard beans left at room temperature for more than 2 hours. Repeated reheating dries beans out and is best avoided.
How do you keep microwaved beans from drying out?
Add 2 to 3 tablespoons of water or broth per can for whole beans, cover loosely to trap steam, heat in short bursts, and let the beans stand covered for 1 minute after heating. If beans still look dry, stir in warm liquid one tablespoon at a time and heat for 30 seconds more. Overheating is the main cause of dry beans, so start short and add time only if needed.
Can you microwave canned beans with cheese?
Yes, but add cheese after the beans are hot, not at the start. Heat the beans first, stir, then sprinkle cheese over the hot beans and let the residual heat melt it, or heat for a final 20 to 30 seconds until just melted. Heating cheese for a full cycle with the beans can make it rubbery, oily, or unevenly melted.
Are microwaved canned beans healthy?
Canned beans are a useful source of fibre and plant protein, and microwaving does not change that in a meaningful way. The bigger nutrition factors are sodium and added sauce. Rinsing whole beans reduces sodium, choosing no salt added beans helps further, and seasoning with herbs, lemon, and spices instead of extra salt keeps the dish lighter. Baked beans in sweet sauce carry more sugar than plain beans in water.
Can you microwave canned beans for a baby or toddler?
Only serve beans to a baby or toddler if their age, feeding stage, and paediatric guidance allow beans, and always mash them well and check the temperature carefully. Heat the beans, stir thoroughly to remove hot spots, let them stand, then test the temperature on the inside of your wrist before serving. Avoid added salt, chilli, and hot sauce for young children, and serve beans soft and mashed, not whole and dry.
How long do microwaved canned beans last in the fridge?
Store leftover beans in a clean, covered container in the fridge and use them within 3 to 4 days. Do not store opened beans in the can. For longer storage, freeze cooked beans in a freezer safe container, label it with the date, and thaw in the fridge overnight before reheating thoroughly.
Sources and further reading
For microwave container safety, see the FDA page on microwave ovens, which notes that metal pans and foil should generally not be used, because microwaves reflect off metal. For leftover reheating, see the USDA guidance on keeping leftovers safe, which advises reheating to 165 degrees Fahrenheit and covering food in the microwave while rotating or stirring it. For a plain language leftover summary, see the Illinois Extension leftover guide, which repeats the 3 to 4 day fridge window and the 165 degree reheating target. Always follow the label on your specific can, because sauce, salt, and heating advice can vary by brand.
USDA: Leftovers, Keep the Best Part Safe
Illinois Extension: Leftovers and Food Safety
Start with the money page for the full microwave guide, then explore related foods and containers. Can You Microwave It? The Complete Guide. Related reading on this site includes canned soup, tortillas, cheese, bread, and frozen vegetables.
